Through the MCP protocol in AI editors, AI can now control the Blender 3D modeling software on your local computer.
Users only need to input their requirements, and Blender will help generate various 3D scenes. After seeing the author's impressive demonstration, I was eager to try it myself. As someone who had never used Blender before, watching AI create models in Blender based on my requirements and modify them according to my feedback was truly powerful. While using it is convenient, setting up the environment does have a certain learning curve.
Project Implementation Principle
First, install a dedicated Blender plugin that connects AI with Blender through a socket service.
It supports 9 Tools that allow AI to create, modify, and delete 3D elements in Blender; modify materials and colors; and get current scene information. Finally, it lets AI generate executable Python code to control elements and scenes in Blender.
Detailed Tutorial
Here's a detailed tutorial on how to install and use BlenderMCP on your computer.
Prerequisites
- Anthropic official account: Claude's MCP functionality currently only supports desktop Claude, so an account is necessary, or you can use Windsurf, Cursor, or VSCode.
- Installed Blender (see Blender installation tutorial)
- Python 3.10 or higher installed on your computer (click here to install Python)
- Mac users need to separately install uv:
brew install uv(uv installation method)
Now you can download the MCP Blender files, extract and open the files.
Run the uvx command to automatically install all missing support libraries:
uvx blender-mcpNext, we need to modify the local Claude configuration file. Open the Claude App, go to 'Claude > Settings > Developer > Edit Config', and add the following content:
{
    "mcpServers": {
        "blender": {
            "command": "uvx",
            "args": [
                "blender-mcp"
            ]
        }
    }
}
The operations for Windsurf, Cursor, or VSCode are similar and won't be elaborated further.
Next, open Blender, go to Edit > Preferences > Add-ons, and add the local plugin. Here you need to select the addon.py file from the MCP Blender code you just extracted.
Then, in the 3D window, click on the newly added MCP Blender Tab, and click "Start MCP Server" to open the plugin service.
Now, open your AI editor app, and you'll see nine small tools added on the right side. These are the tools we need to call the Blender service.
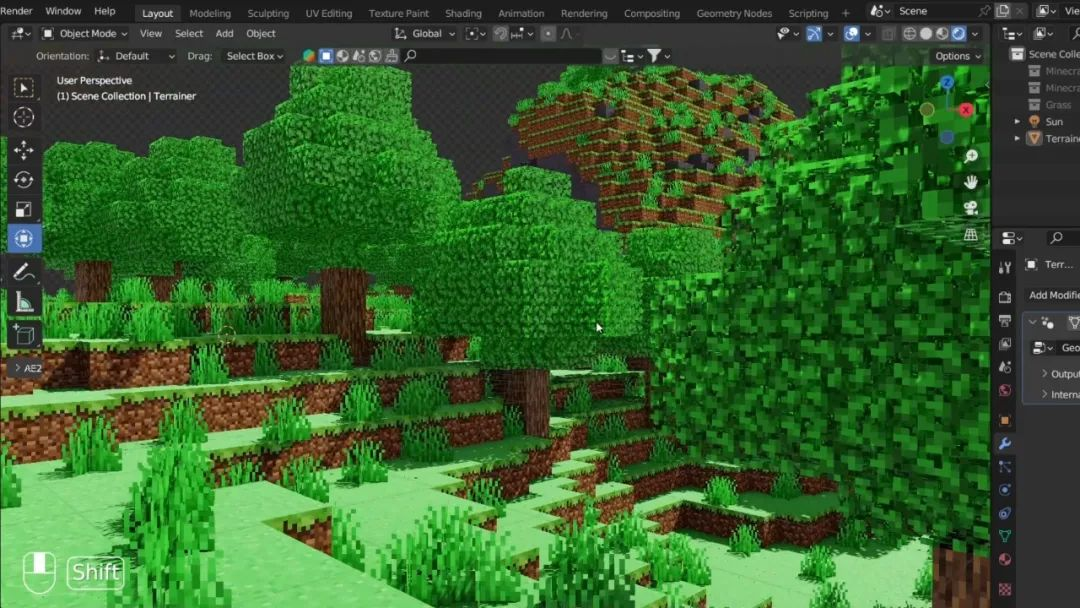
Creating a Minecraft Scene
Let's input a prompt to build a Minecraft scene in Blender with the following elements:
Scene Requirements
- Terrain: Use Perlin noise or a simple sine function to create natural terrain, a large area of grassland made of Minecraft grass blocks, with highlands, depressions, and rivers. Each grass block has brown soil material at the bottom and green grass material on top.
- Villa: A three-story Minecraft-style villa made of blocks. Use Minecraft style design with large floor-to-ceiling windows and pay attention to color matching.
- Trees: Randomly plant some one-story high Minecraft-style trees in the scene.
- Stream: A small stream made of liquid material.
- Weather: Rainy day, use the Blender plugin "MCPrep"'s Spawner (Effects + weather) Snow feature.
- Sky: Use the Blender plugin "MCPrep"'s World Tools -> Create MC Sky function.
You can add other objects according to Blender's style, with the ultimate goal of reaching award-winning level in a Blender Minecraft competition.
MCPrep Plugin
You can use the Blender plugin "MCPrep". You can learn how to use this plugin at https://theduckcow.com/dev/blender/.
This plugin has several Mobs already installed, with many components that can be used directly:
- World Tools
- Create MC Sky
- Skin Swapper
- alex.png
- steve.png
- template-skin.png
- theduckcow.png
- Spawner
- Mob spawner, such as Cow, Cod Fish, Chicken, Slime, Snowman, Zombie
- Block (model) spawner: acacia_leaves, bamboo1_age0
- Item Spawner: birch sign, black candle, black dye, bow, book, carrot, clock, gold ingot, green dye, flower pot, furnace minecart, mangrove bot
- Effects + weather: Snow, Ash, Rain, Spores, Leafy Wind, Firefly
- Entity spawner: Arrow, Bot, Bow, Crossbow
- Meshswap spawner: Torch, Spawner, Soul_Torch, Banner, Chest
Creating Minecraft Character Alex
You can also ask AI to model a Minecraft character like Alex in Blender, following Minecraft style and textures. Pay attention to clothing, expressions, and other details to ensure consistency with the game. Make sure the head and body proportions are correct, and that the head, body, legs, and arms are attached together, not separated! The final effect should be good enough to win in a game competition.
Working with AI
Before AI calls MCP, it will ask for your permission. Just click Allow.
If the AI connection tool shows a connection error, just close and reopen the Blender plugin.
You'll see that AI gradually helps us generate the scene. What's most surprising is that it doesn't output all the code at once but continuously reviews the construction results. If the results are not satisfactory, it can debug within one conversation round.
Once the build is complete, we can ask it to adjust: "I think the clothing and texture still have some gaps compared to Minecraft, please adjust."
We can also ask it to create larger scenes, such as: "Please help me create a Minecraft-style grassland. Note that the grassland should be composed of individual blocks, with brown soil texture at the bottom of each block and green grass texture on top. You can find similar textures in the resource library."
Then we can ask it to build a villa on the lawn: "Help me make a Minecraft-style villa."
Finally, we can ask it to add some trees, rivers, small hills, and torches.
What you can create now doesn't depend on how much you know about Blender skills, but on how patient you are and how accurately you can describe your requirements.