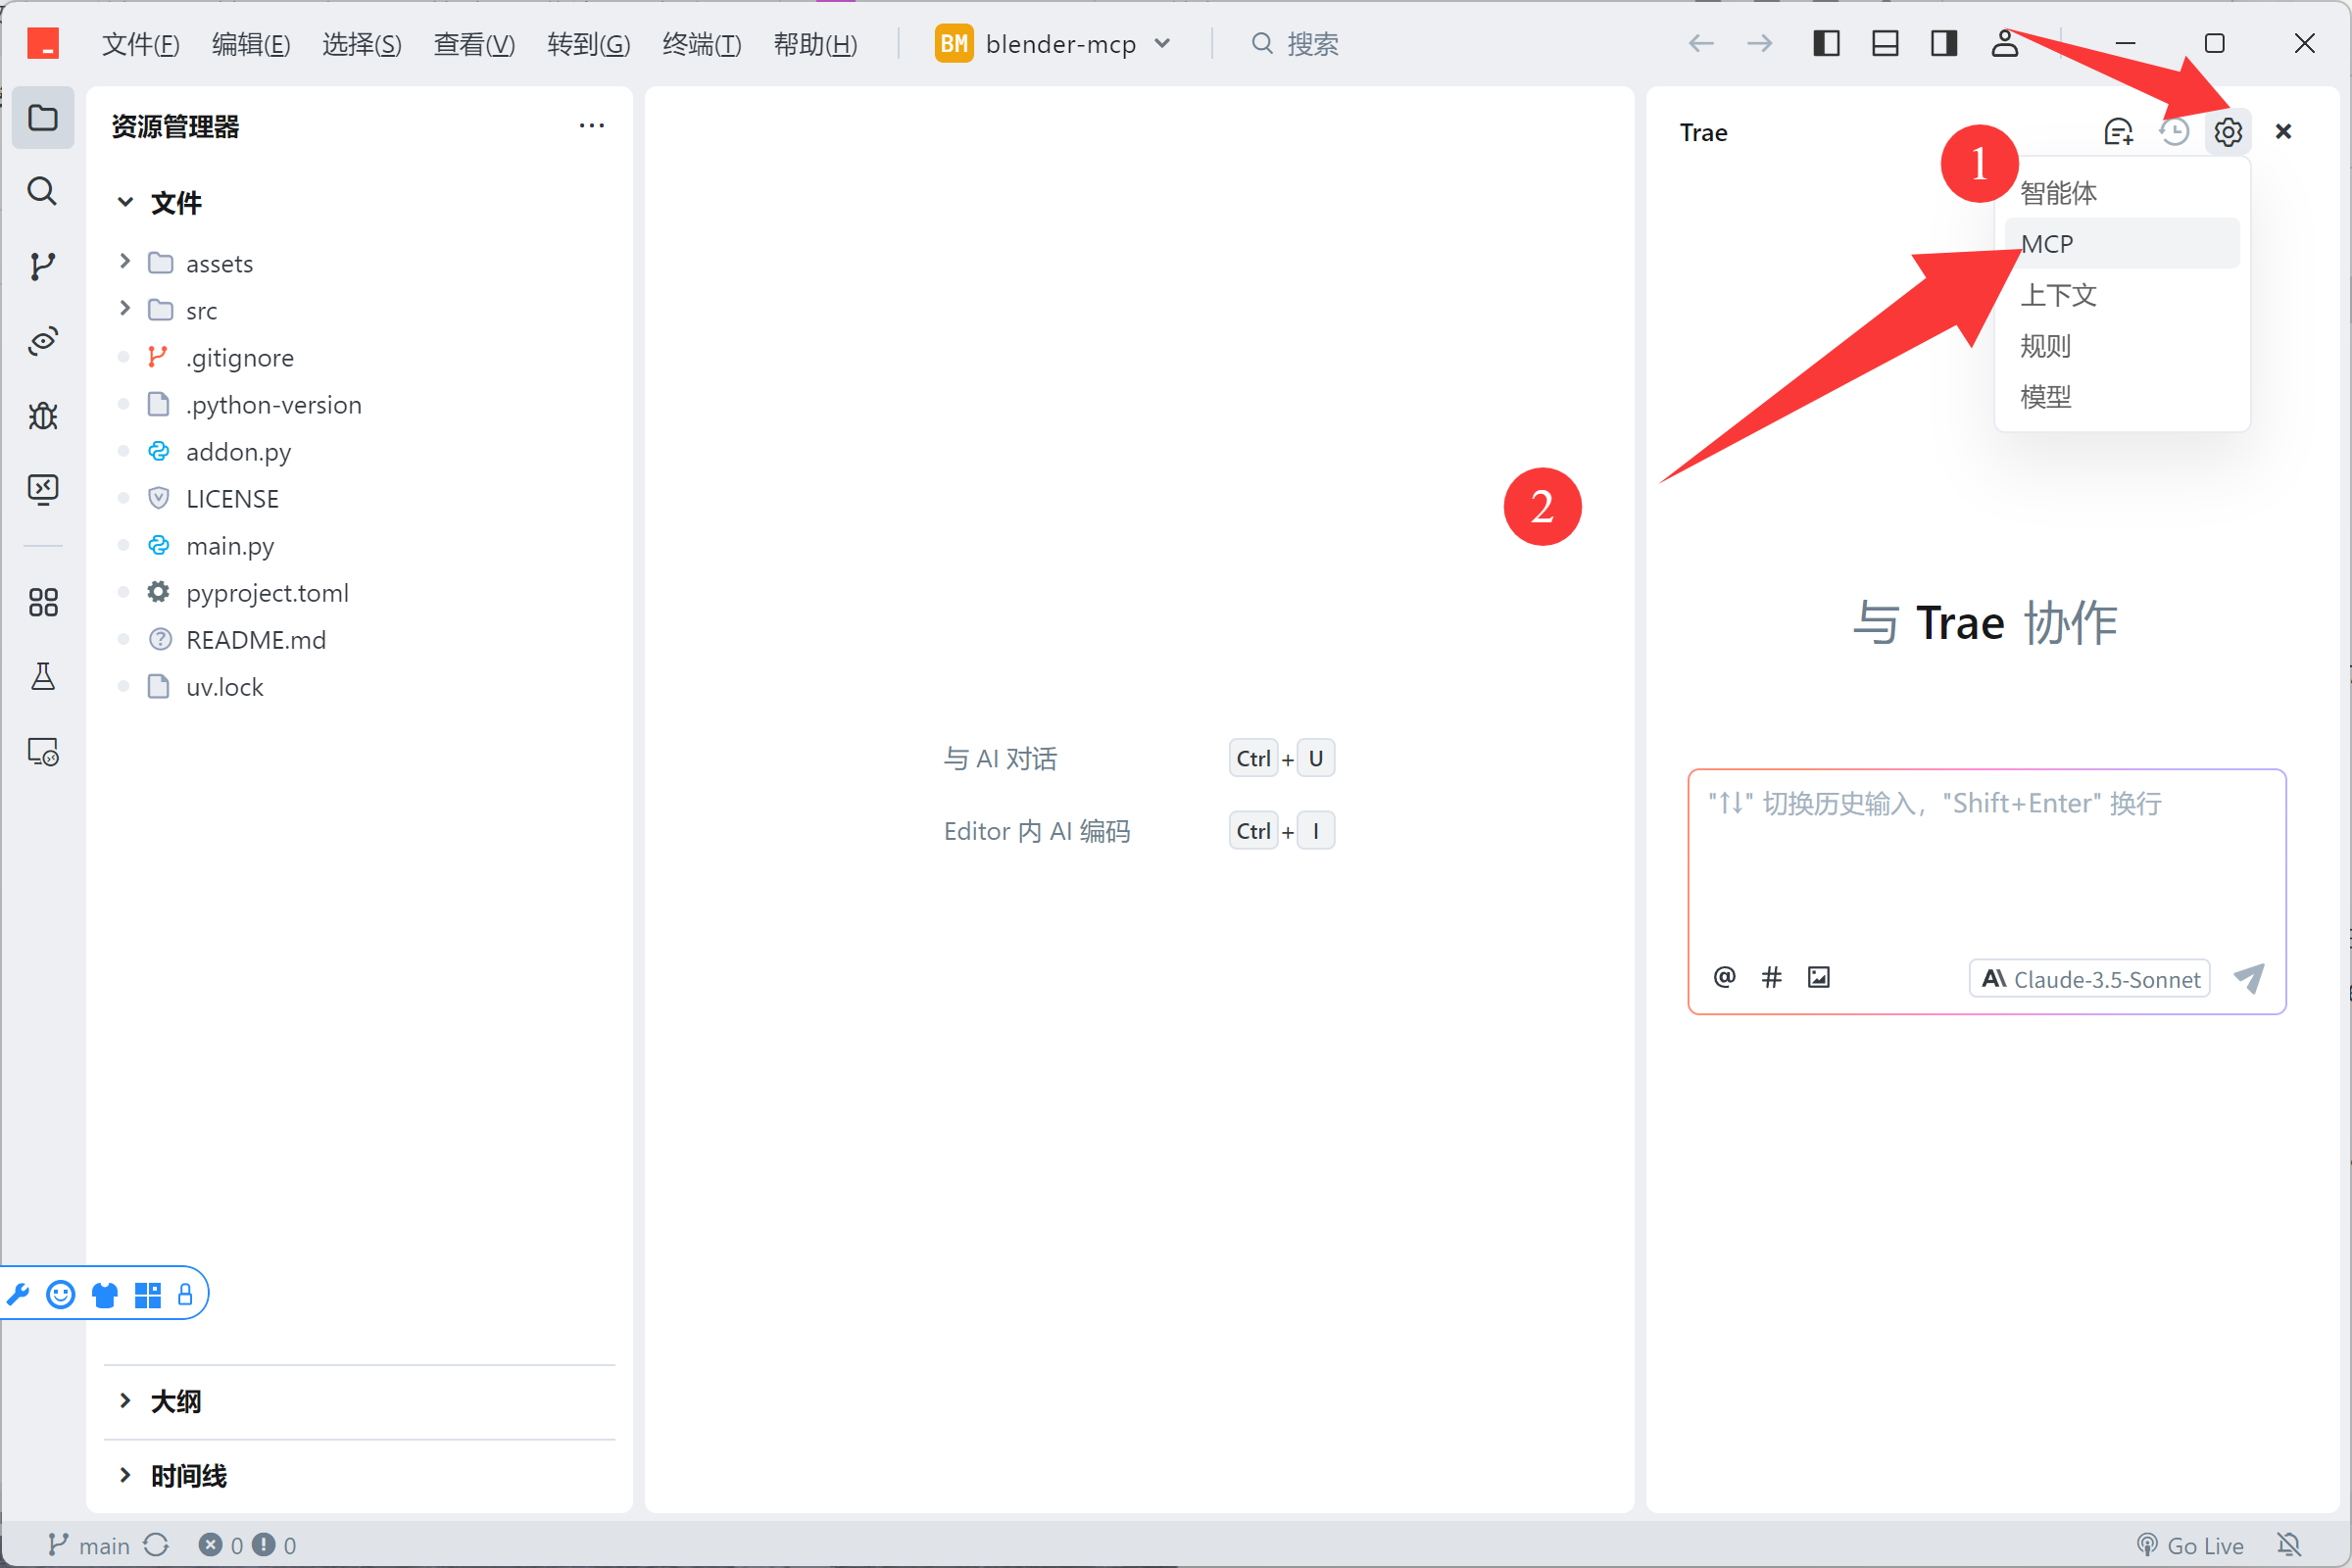
Step 2: Add MCP Configuration
In Trae Editor, you need to add the MCP server configuration:
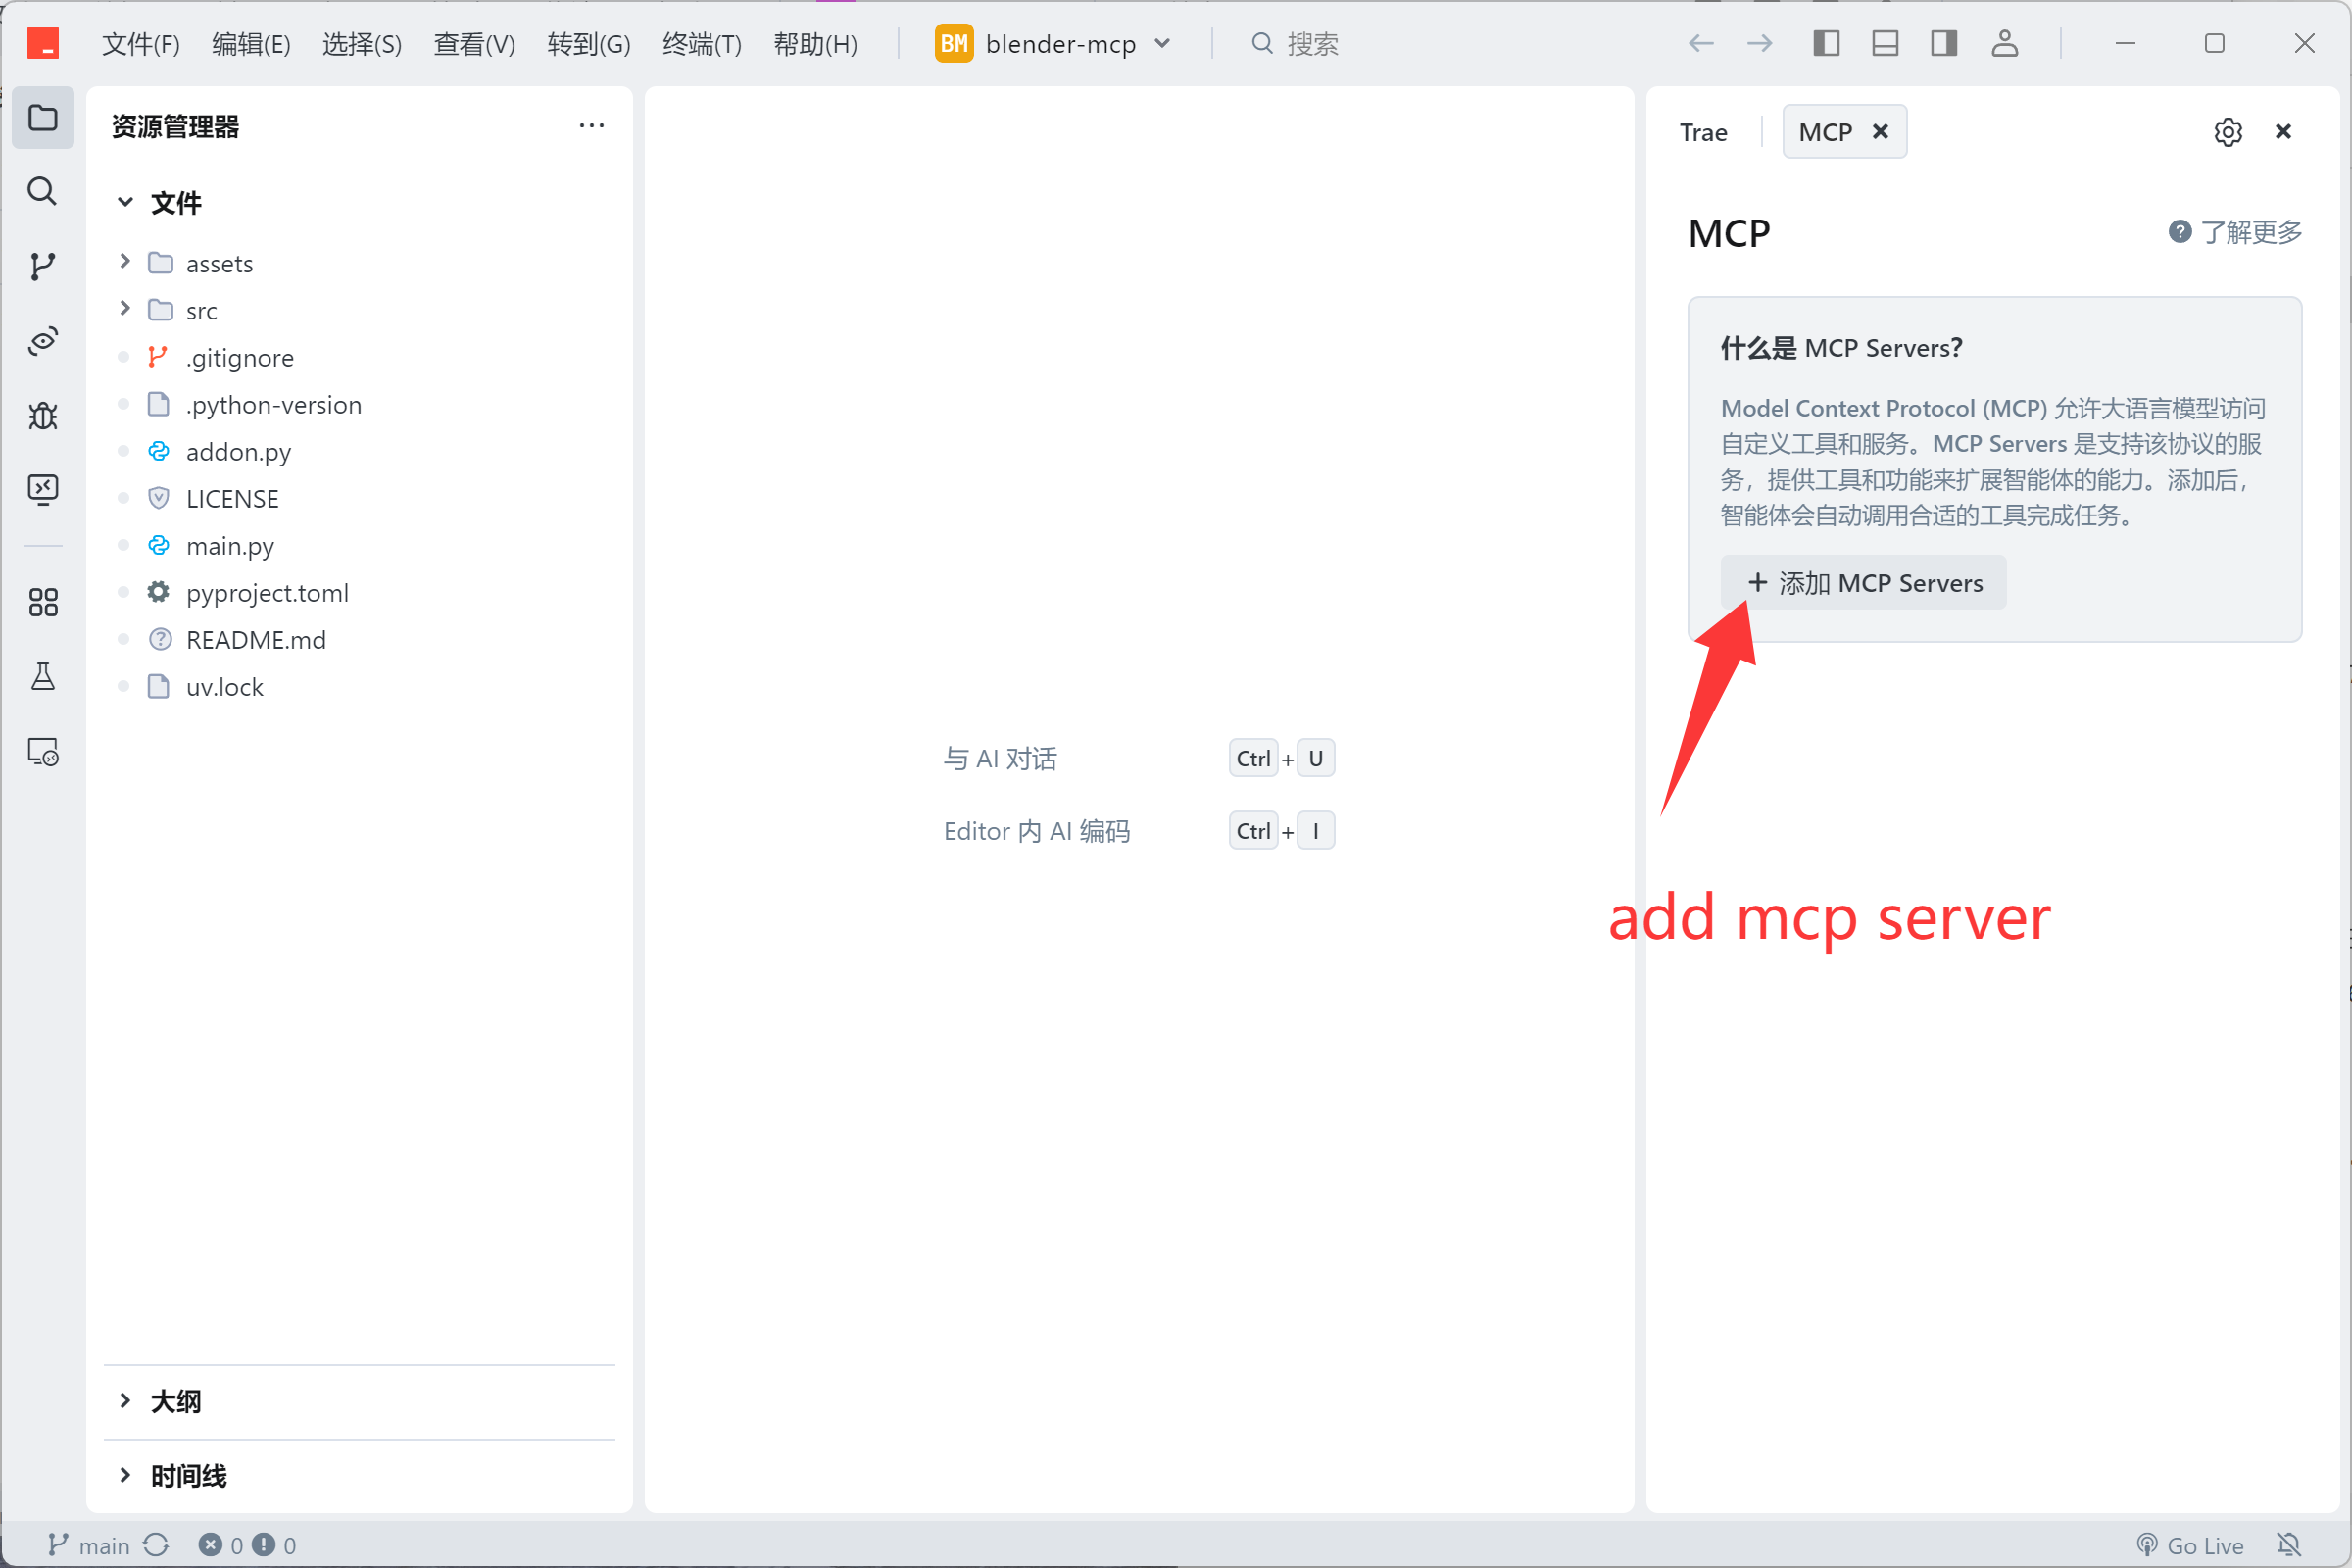
Click the "Add MCP Servers" button to prepare adding the Blender MCP configuration information.
Prerequisites
Before you begin, make sure you have installed the following:
- Blender 3.0 or higher
- Trae Editor (latest version)
- Python 3.10 or higher
- uv package manager
- Blender MCP plugin
Install uv on Windows:
pip install uv
Step 3: Configure Blender MCP
Now, you need to configure the connection between Blender MCP and Trae Editor:
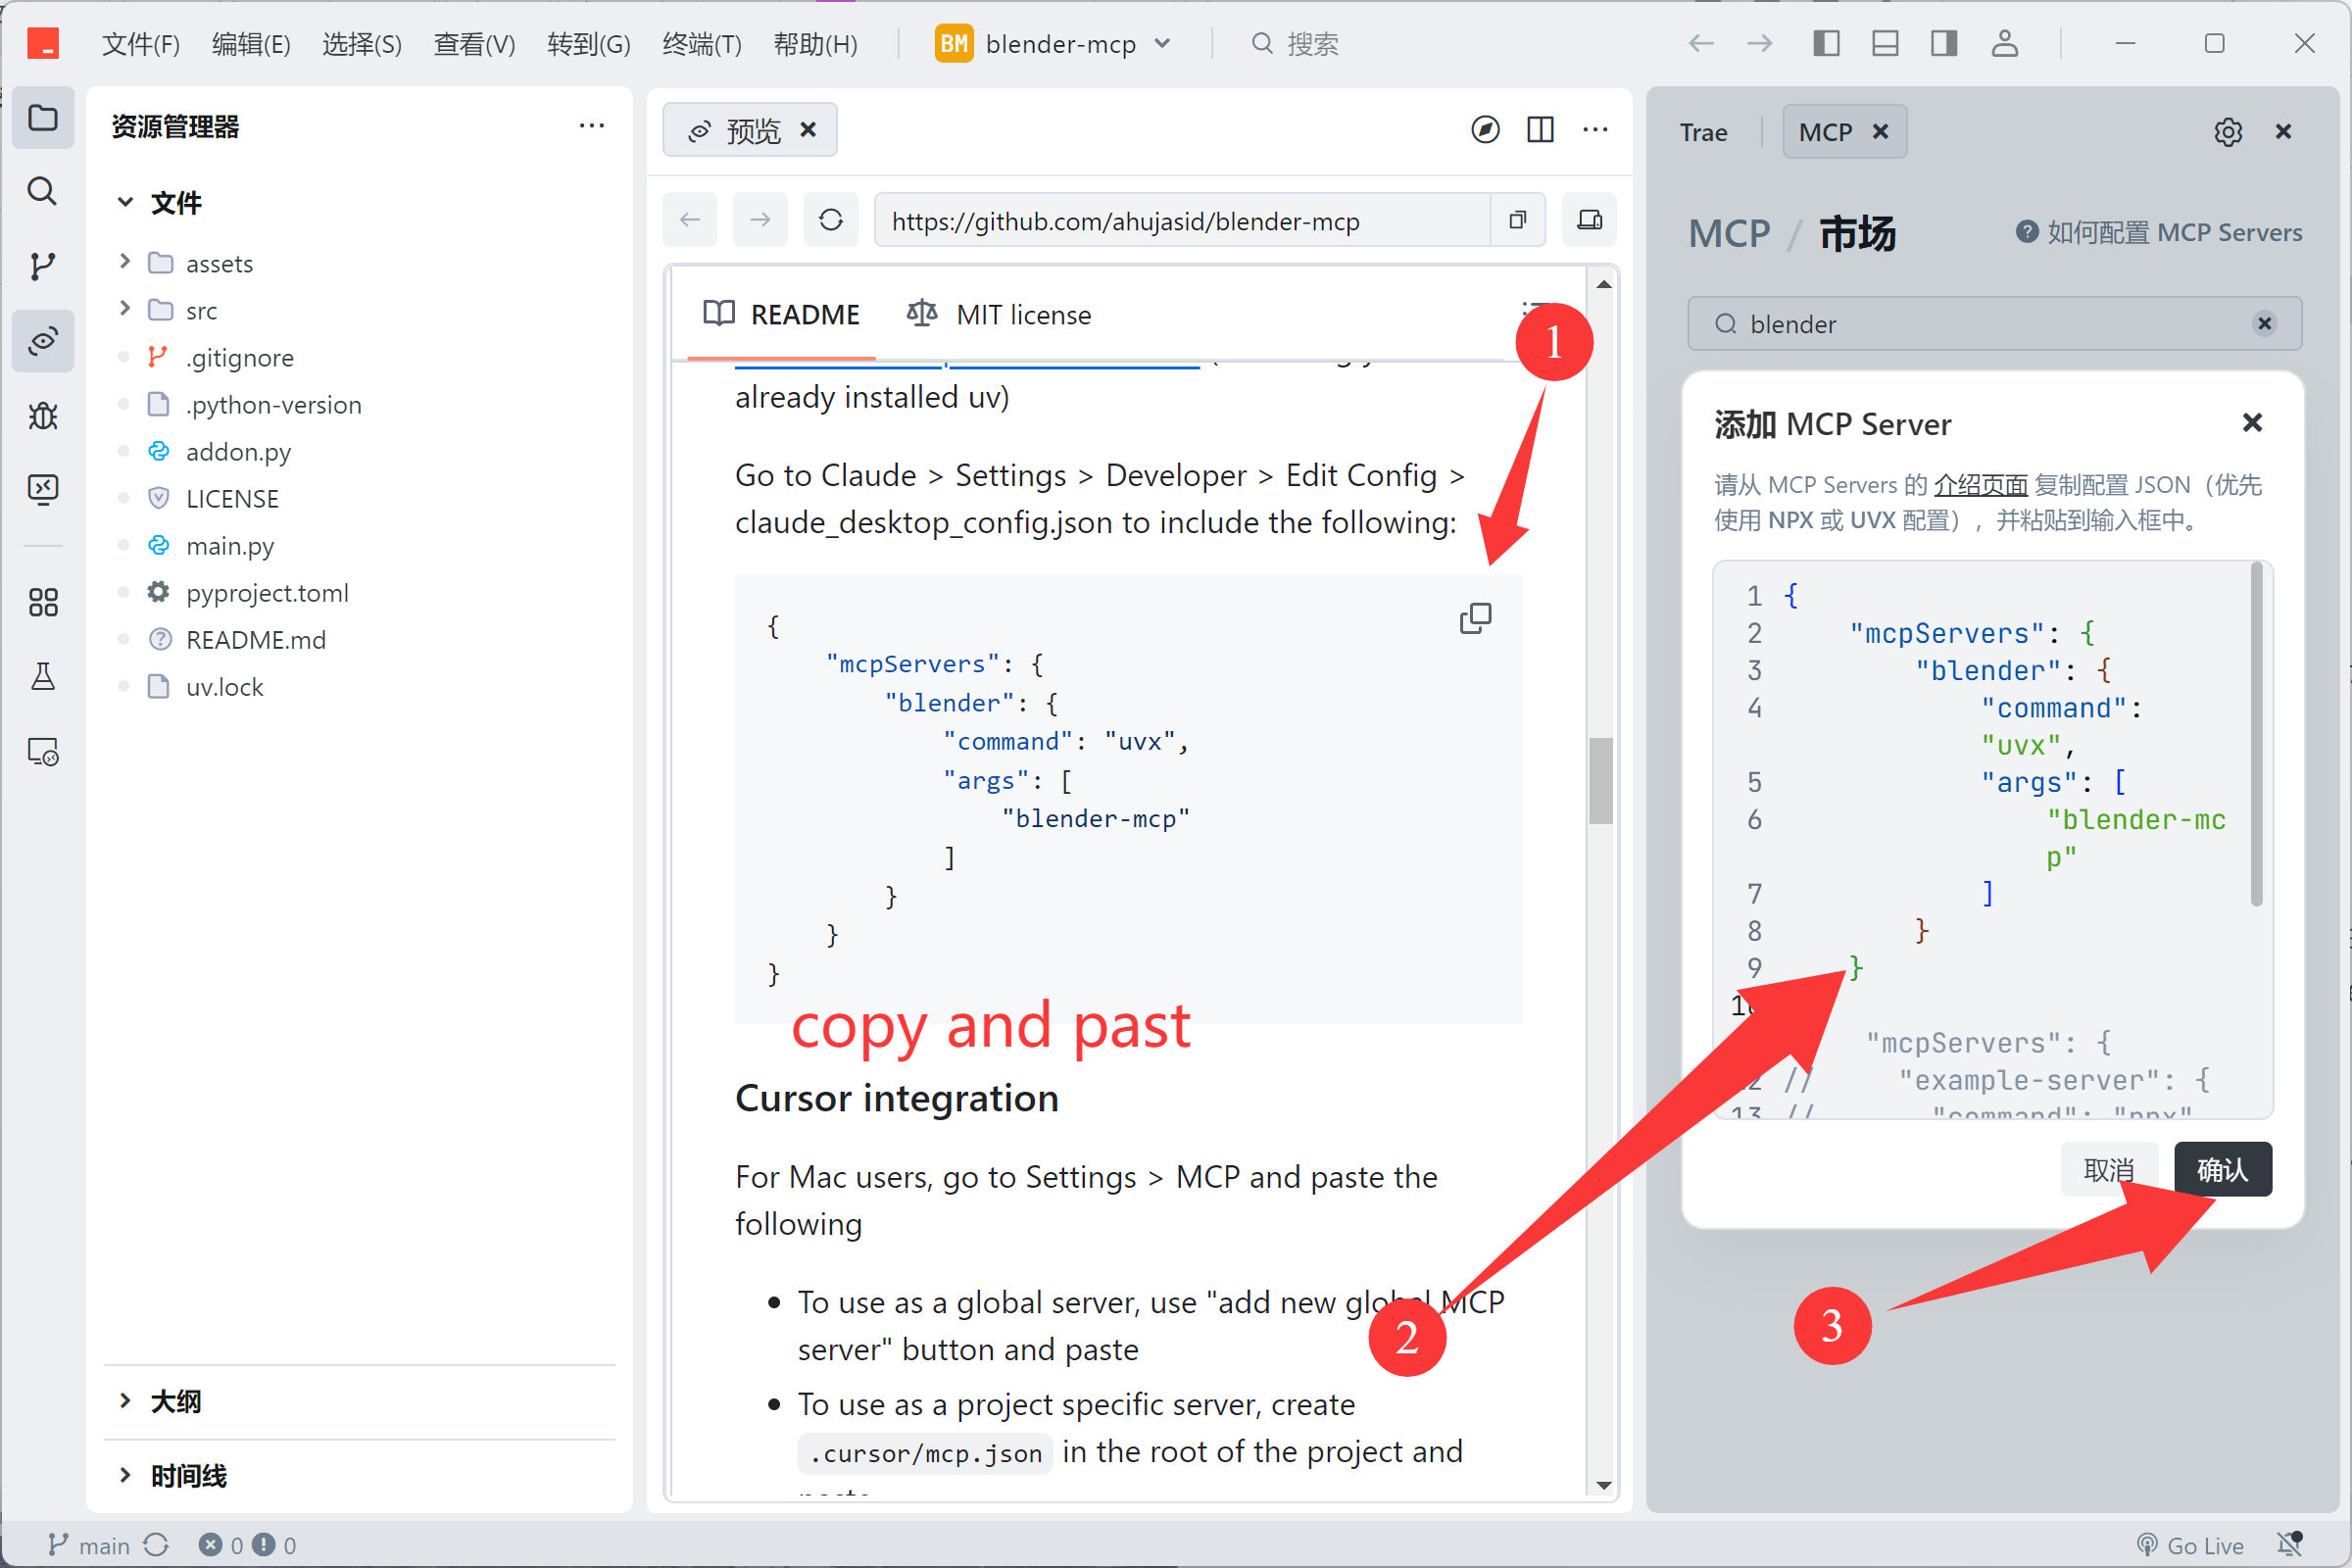
As shown in the image, you need to copy and paste the MCP configuration information. This configuration will enable Trae Editor to communicate with Blender.
MCP Server Settings
Configure the MCP server to enable communication between Trae Editor and Blender:
uvx blender-mcp
This command starts the Blender MCP server, which will handle the communication between Trae Editor and Blender.
Step 4: Verify Successful Configuration
After completing the configuration, you should be able to see that Blender MCP has been successfully connected:
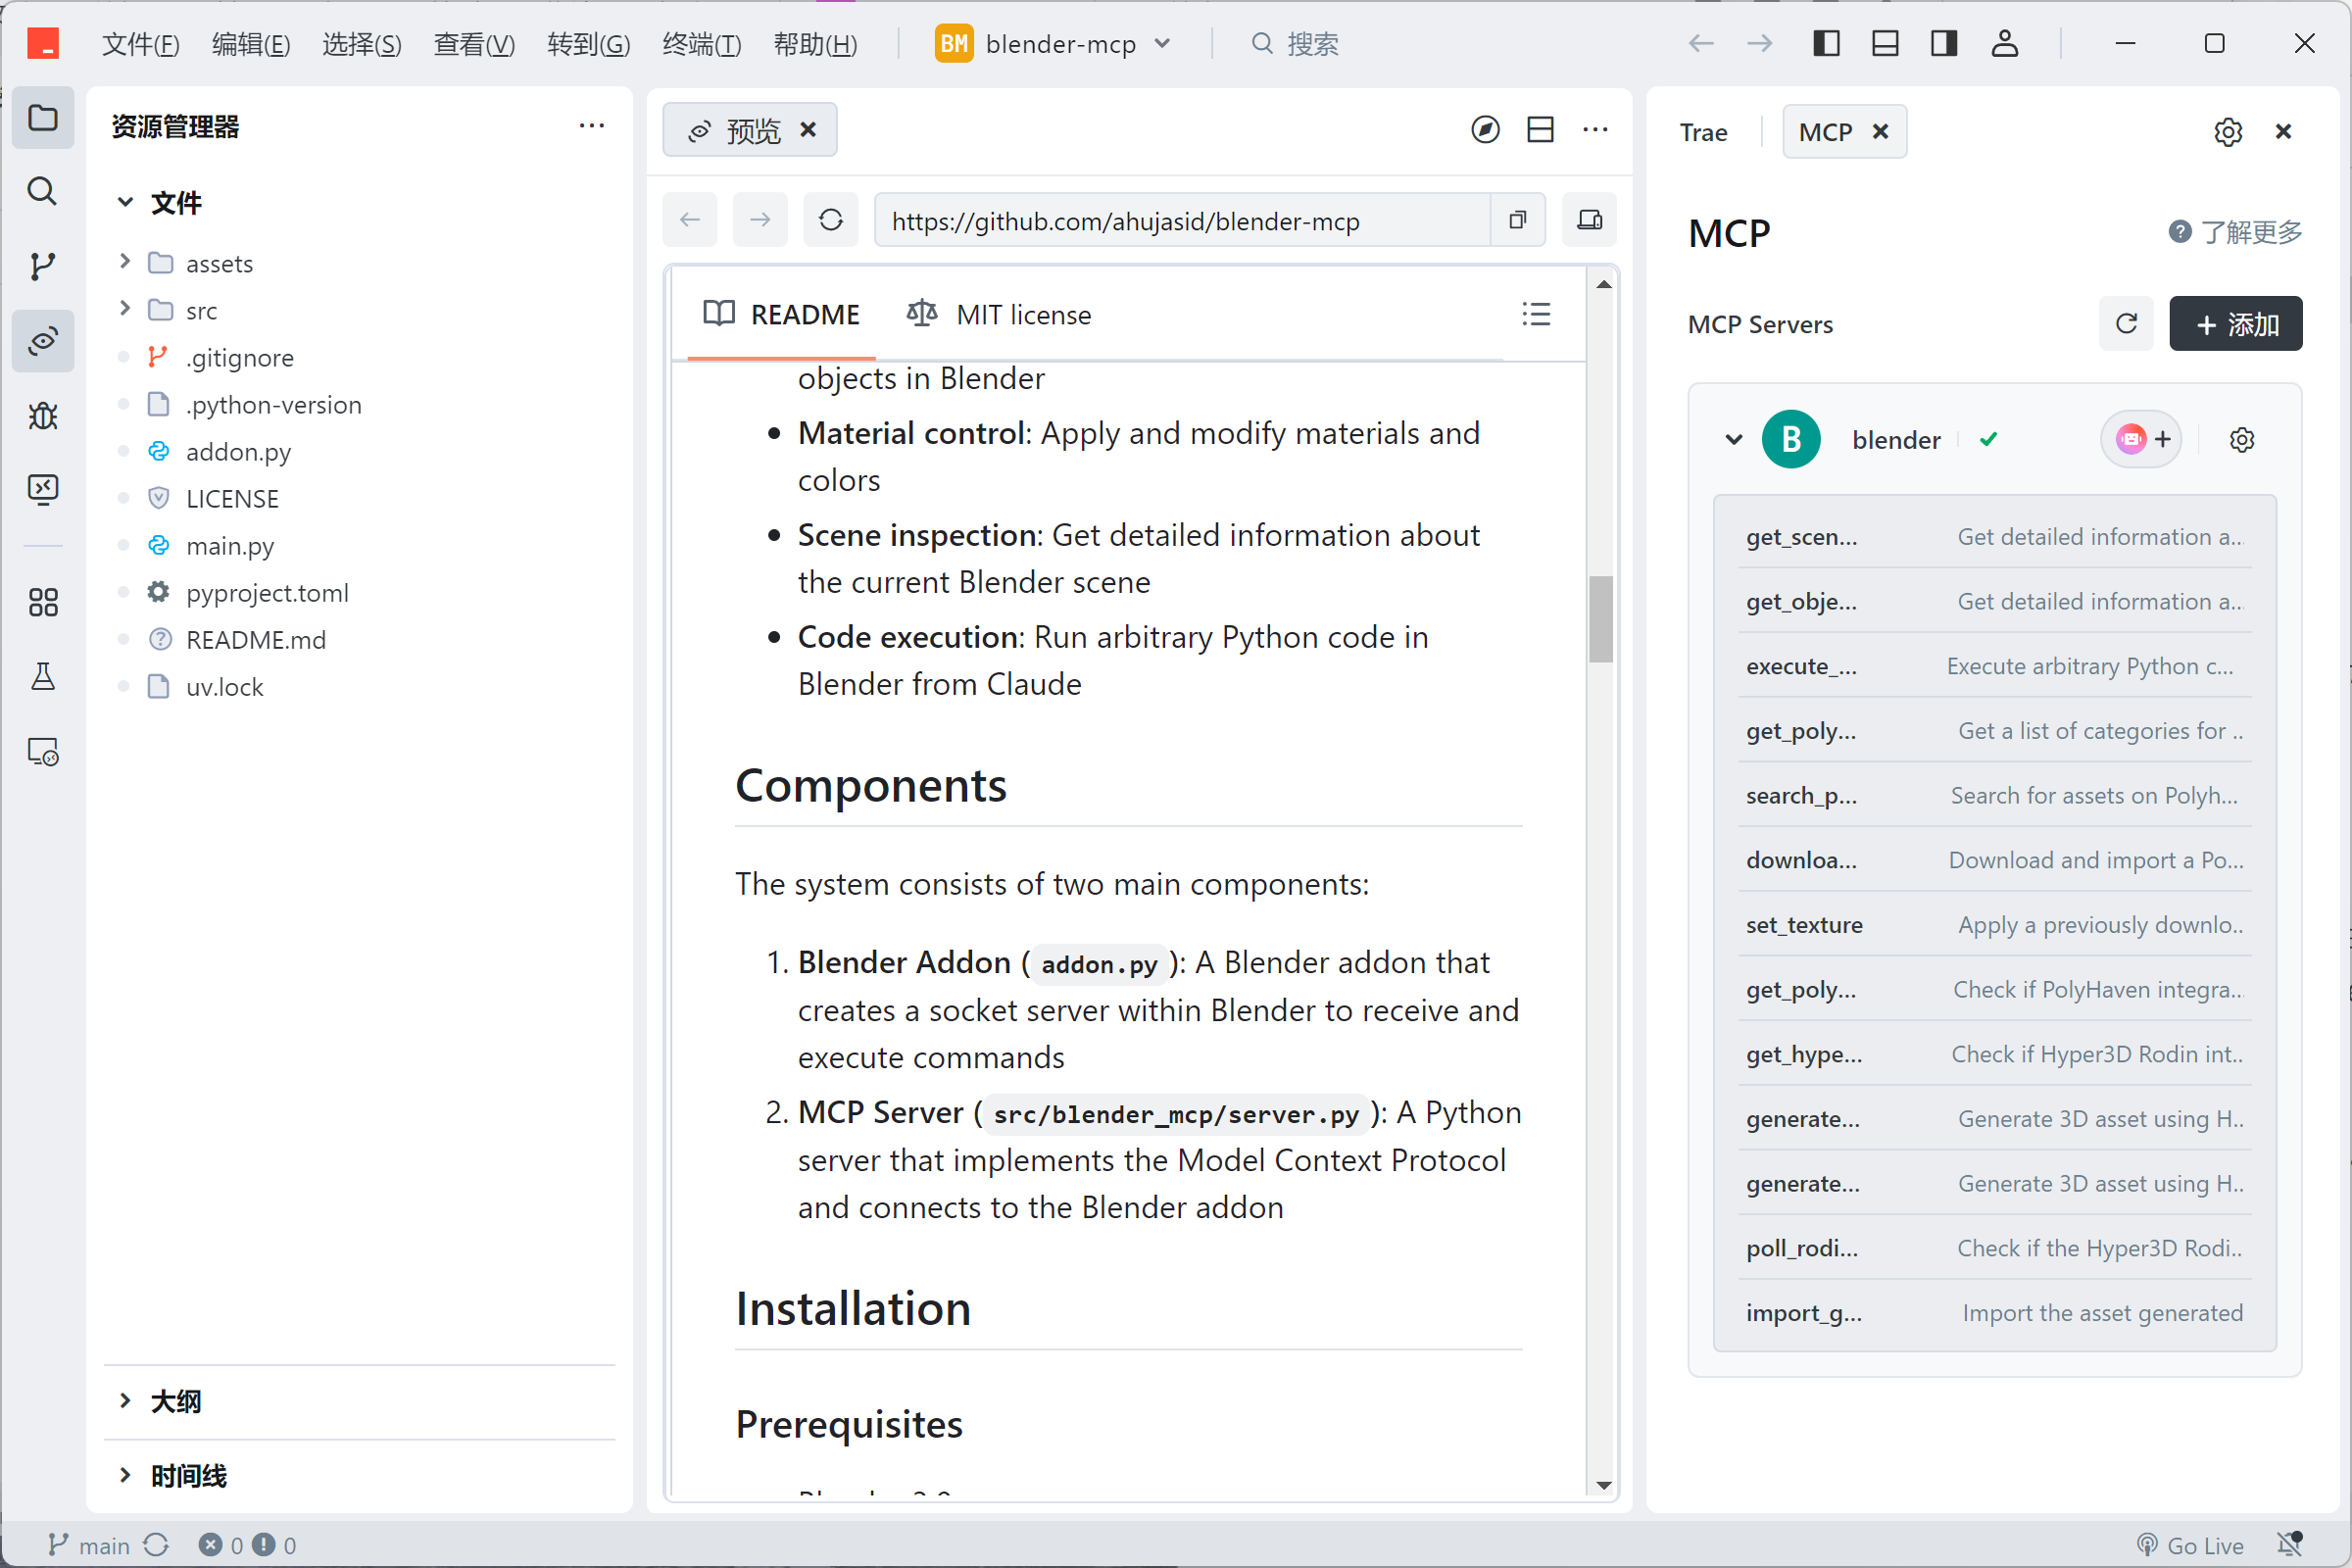
As shown in the image, you can see that the Blender MCP server has been successfully connected and various features are available for use.
Test Connection
Verify that Trae Editor can communicate with Blender through the MCP server:
- Open Blender and ensure the MCP plugin is active
- In Trae Editor, create a new Python file
- Write a simple Blender Python script, for example:
import bpy
bpy.ops.mesh.primitive_cube_add(size=2, location=(0, 0, 0))
print("Cube created successfully!")
Use Trae's AI capabilities to help generate or modify this script, then execute it to see if it creates a cube in Blender.