In my decade-plus of Blender work, I've noticed something: beginners struggle not because they lack artistic sense, but because they don't understand Blender's underlying logic. The interface seems random — objects spawn in weird places, rotations happen around unexpected points, and nothing behaves quite how you expect.
This changes today. We're diving deep into the invisible systems that control everything: the 3D Cursor, Origin points, and coordinate systems. Understanding these is the difference between fighting Blender and making it do exactly what you want.
The Essential Concepts
3D Cursor
The red-and-white targeting ring that determines where new objects appear
Origin Point
The yellow dot that defines an object's center for transforms
Coordinate Systems
Global (world) vs Local (object) — knowing which is active changes everything
Pivot Points
The center around which rotation and scaling occur
Panel Management: Blender is Flexible
Before we dive into invisible systems, let's talk about the visible ones. Blender's interface is infinitely customizable — and infinitely breakable if you don't know what you're doing.
Panel Replacement
Every panel has an icon in its upper-left corner. Click it to swap that panel for something else entirely:
- 3D Viewport → Image Editor
- Outliner → Timeline
- Properties → Shader Editor
This is why Workspaces exist — they're just saved panel configurations.
Splitting and Joining Panels
To Split
Hover over a panel corner until you see a cross cursor. Drag inward to create a new division.
To Join
Hover over the corner. Drag toward the neighboring panel (darkened arrow shows merge direction) and release.
Maximize/Restore Panel
Quickly expand the panel under your mouse to full screen, then restore it
Saved from Disaster: Resetting Layout
Messed up your interface? Top bar + → General → Layout creates a fresh workspace. Right-click the tab → Reorder to Front to move it to first position. Done.
The 3D Cursor: Your Invisible Placement Tool
That red-and-white dashed ring isn't decoration. It's one of Blender's most powerful tools — and one of the most misunderstood.
What the 3D Cursor Does
The 3D Cursor has one primary job: it tells Blender where to put new things.
The Golden Rule
Cursor Position = New Object Location
When you press Shift + A to add an object, it spawns exactly where the 3D Cursor sits. Every. Single. Time.
Moving the 3D Cursor
| Method | Action |
|---|---|
| Tool Method | Click Cursor tool in left toolbar, then click anywhere in viewport |
| Shortcut Method | Shift + Right Mouse Button directly places cursor |
| Reset Method | Shift + C snaps cursor back to world origin |
The Snap Pie Menu: Shift + S
This menu alone is worth the tutorial. Press it, and you get:
Cursor to Selected
Move cursor to center of selected object
Selection to Cursor
Move selected object to cursor position
Cursor to World Origin
Reset cursor to (0, 0, 0)
Pro Workflow: Cursor as Placement Tool
Instead of creating an object then moving it, I place my cursor first, then create. It saves an entire transform operation. Multiply that by hundreds of objects over a project, and you've saved hours.
The Cursor as Pivot Point
The 3D Cursor has a second, equally important function: it can serve as the center of rotation and scaling for your transforms.
Changing Pivot Points
Look at the top bar, middle section. There's a dropdown called "Transform Pivot Point." The default is "Median Point," but you have options:
Bounding Box Center
Rotates around the center of the invisible box surrounding all selected objects
Median Point
Rotates around the average center of all selected objects (default)
Individual Origins
Each object rotates around its own origin simultaneously
Active Element
Rotates around the last-selected object (shown in bright yellow)
3D Cursor
Rotates around the cursor position — this is where the magic happens
Practical Example: Rotating Around Cursor
The Origin Point: Computer Logic vs Human Logic
Here's something that trips up everyone: Blender doesn't care about your object's shape. It only cares about one tiny yellow dot.
What is an Origin?
The Origin is a single point that stores an object's position in 3D space. When you move, rotate, or scale an object, Blender is actually transforming that yellow dot — the rest of the mesh just comes along for the ride.
The Tree Problem
Imagine you're modeling a tree. You create a cube as the trunk and scale it upward. But the Origin is in the center of the cube, so when you scale, the tree grows in both directions — up and down. Not what you want.
The solution: Move the Origin to the bottom of the trunk. Now when you scale, the tree grows upward from the ground.
Moving Only the Origin
Blender has a specific mode for this:
- Select your object
- Top-right corner: Click Options
- Check Affect Only: Origins
- Press
Gto move the origin point - Critical: UNCHECK "Affect Only: Origins" when done!
The #1 Beginner Mistake
You forget to uncheck "Affect Only: Origins." Suddenly, nothing moves when you press G. You think Blender is broken. Your origin just moved when you wanted to move the object.
The fix: Always, always, ALWAYS uncheck that box immediately after adjusting origins.
Applying Transforms
Sometimes you scale an object and things get weird — modifiers behave oddly, textures stretch. The solution? Ctrl + A to Apply Transforms, then choose Scale.
This tells Blender "this is the new normal — forget the original, treat this as the base state."
Coordinate Systems: Global vs Local
This distinction seems abstract until it isn't — and then it's the difference between your model working and falling apart.
Global Coordinate System
Global = World Absolute Direction
- X always points left/right
- Y always points forward/backward
- Z always points up/down
No matter how your object is rotated, Global coordinates never change.
Local Coordinate System
Local = Object's Personal Space
- X, Y, and Z move WITH the object
- Rotate an object 90°, and its local Z axis might now point sideways
- Each object has its own local coordinate system
The Double-Tap Technique
This is one of those things that, once you know it, you use forever:
Global ↔ Local Switching Mid-Transform
Start a transform (G, R, or S), then press an axis key ONCE for Global, TWICE for Local:
G → Z = Move along global Z (world up)G → Z → Z = Move along local Z (object's up direction)
Pro Insight: When Local Matters
Modeling a character? You want Local coordinates — moving her arm forward should move it along HER forward, not the world's. Architectural visualization? Global is your friend — walls don't get rotated.
Preference Settings That Change Everything
These two settings are disabled by default in some Blender versions, but enabling them makes the experience infinitely better:
Zoom to Mouse Position
Location: Edit → Preferences → Navigation
What it does: Zoom centers on your mouse cursor instead of viewport center
Why enable it: Precision zooming — zoom directly into what you're looking at
Orbit Around Selection
Location: Edit → Preferences → Navigation
What it does: Viewport rotation centers on selected object instead of scene center
Why enable it: Keeps your focus object in view while orbiting — essential for detailed work
Common Pitfalls and Solutions
🔴 Only the orange dot moves
Symptom: You press G to move an object, but only the yellow dot moves, not the mesh
Cause: "Affect Only: Origins" is still checked
Solution: Go to Options and uncheck it
🔴 Interface is broken
Symptom: Panels are tiny, things disappeared, nothing makes sense
Cause: Accidental splits/merges
Solution: Create a fresh General Layout workspace
🔴 Rotation direction is wrong
Symptom: Object rotates in unexpected direction
Cause: Pivot Point is set to 3D Cursor, not Median Point
Solution: Check the Pivot Point dropdown in the top bar
🔴 Movement feels "wrong"
Symptom: Object moves diagonally when you press Z
Cause: Object is rotated and you're in Local mode
Solution: Press axis key only once for Global, or clear rotation with Alt + R
Part 2: Using MCP Commands for Interface Logic
Now let's see how natural language commands handle these concepts through MCP.
1. 3D Cursor Control with MCP
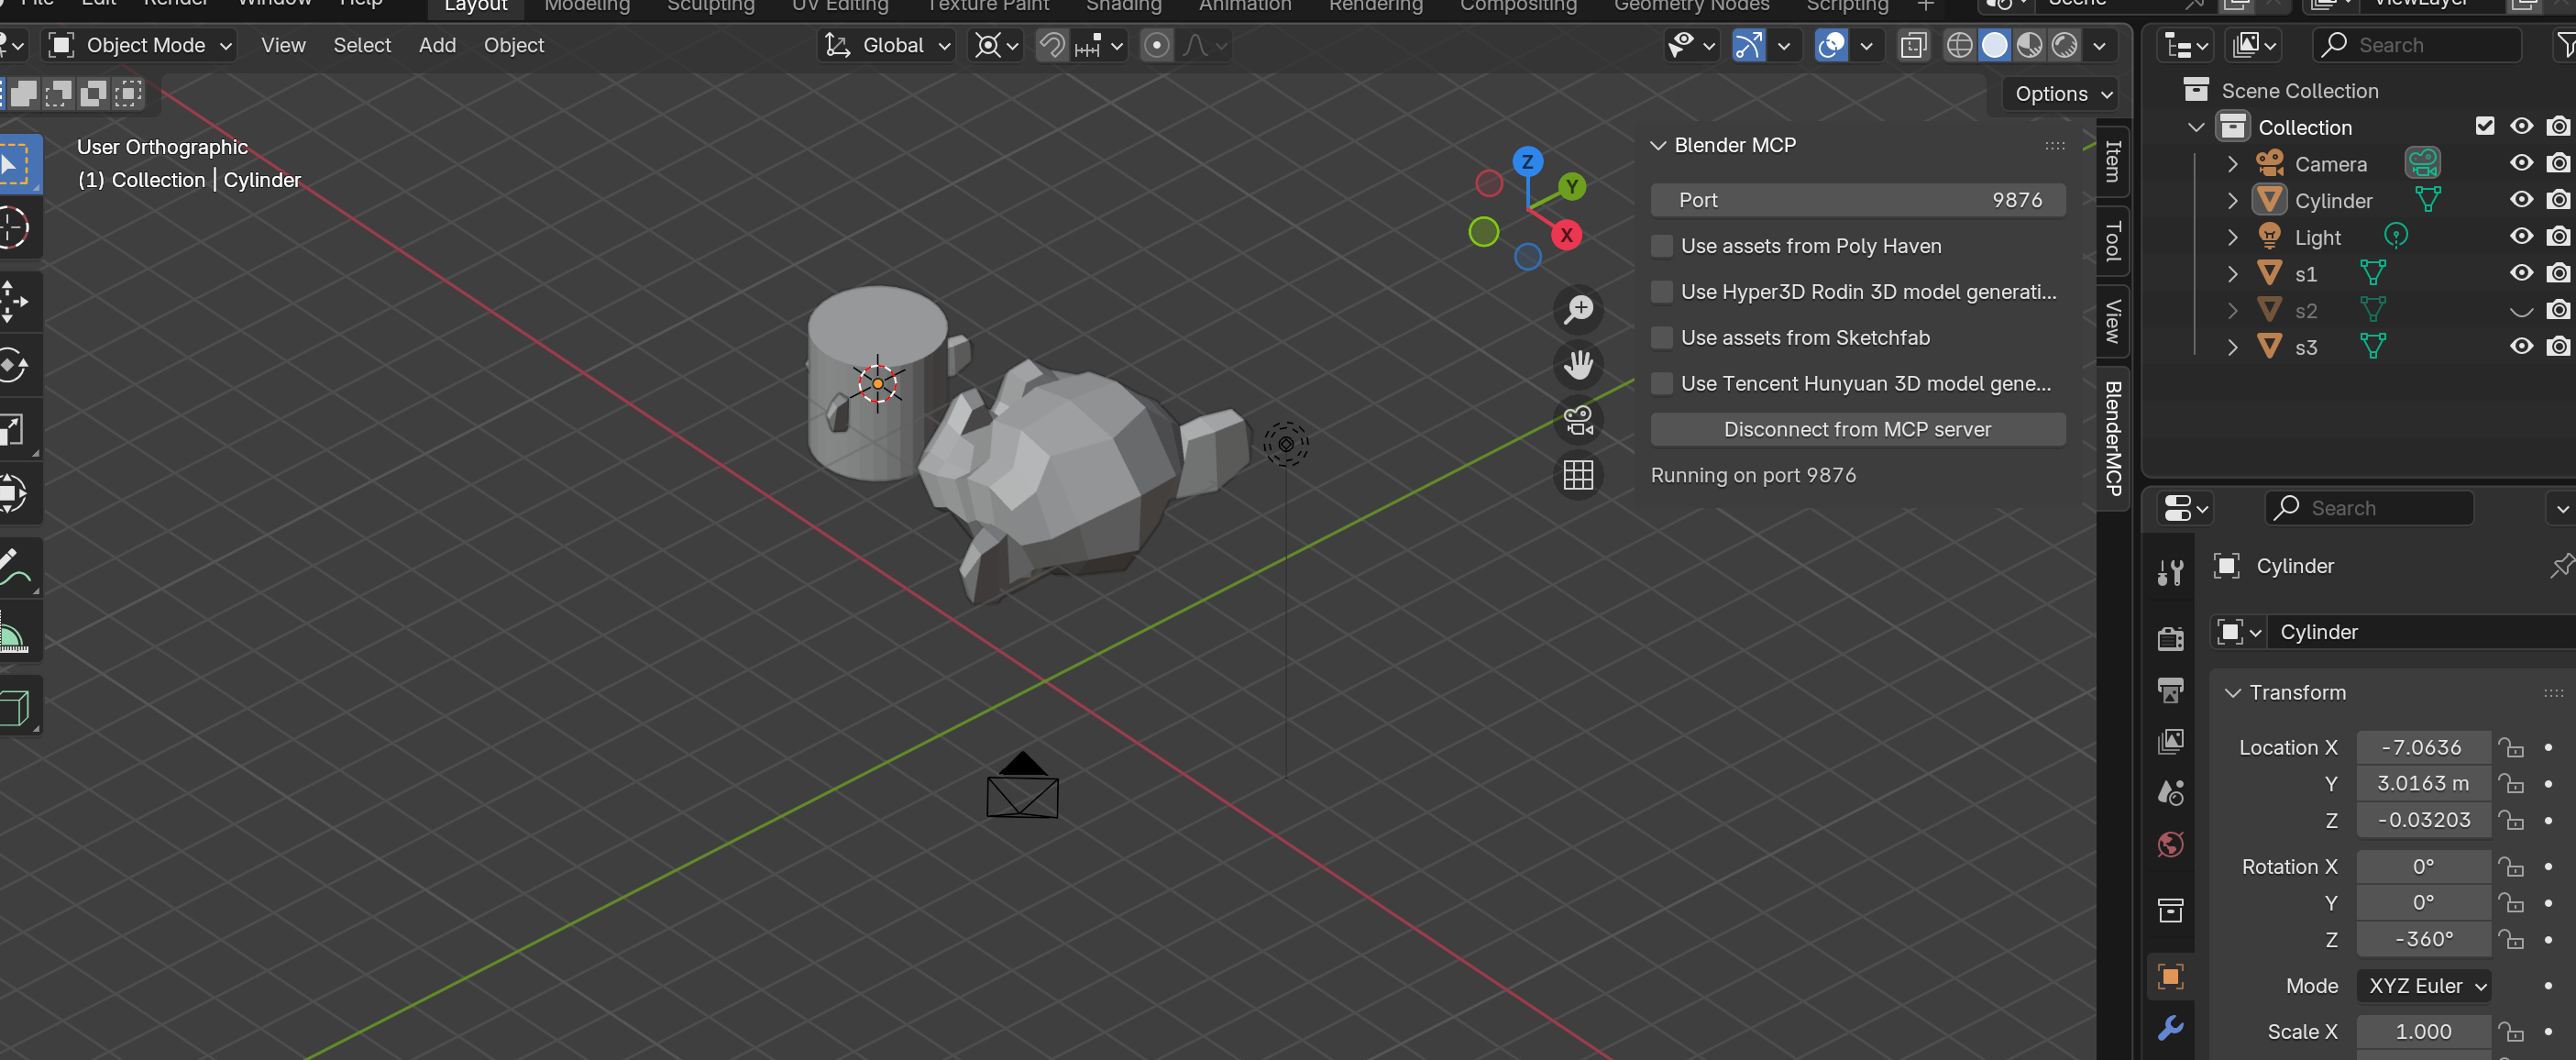
Recall from Part 1, we named our monkey heads s1, s2, and s3. Let's position the cursor precisely:
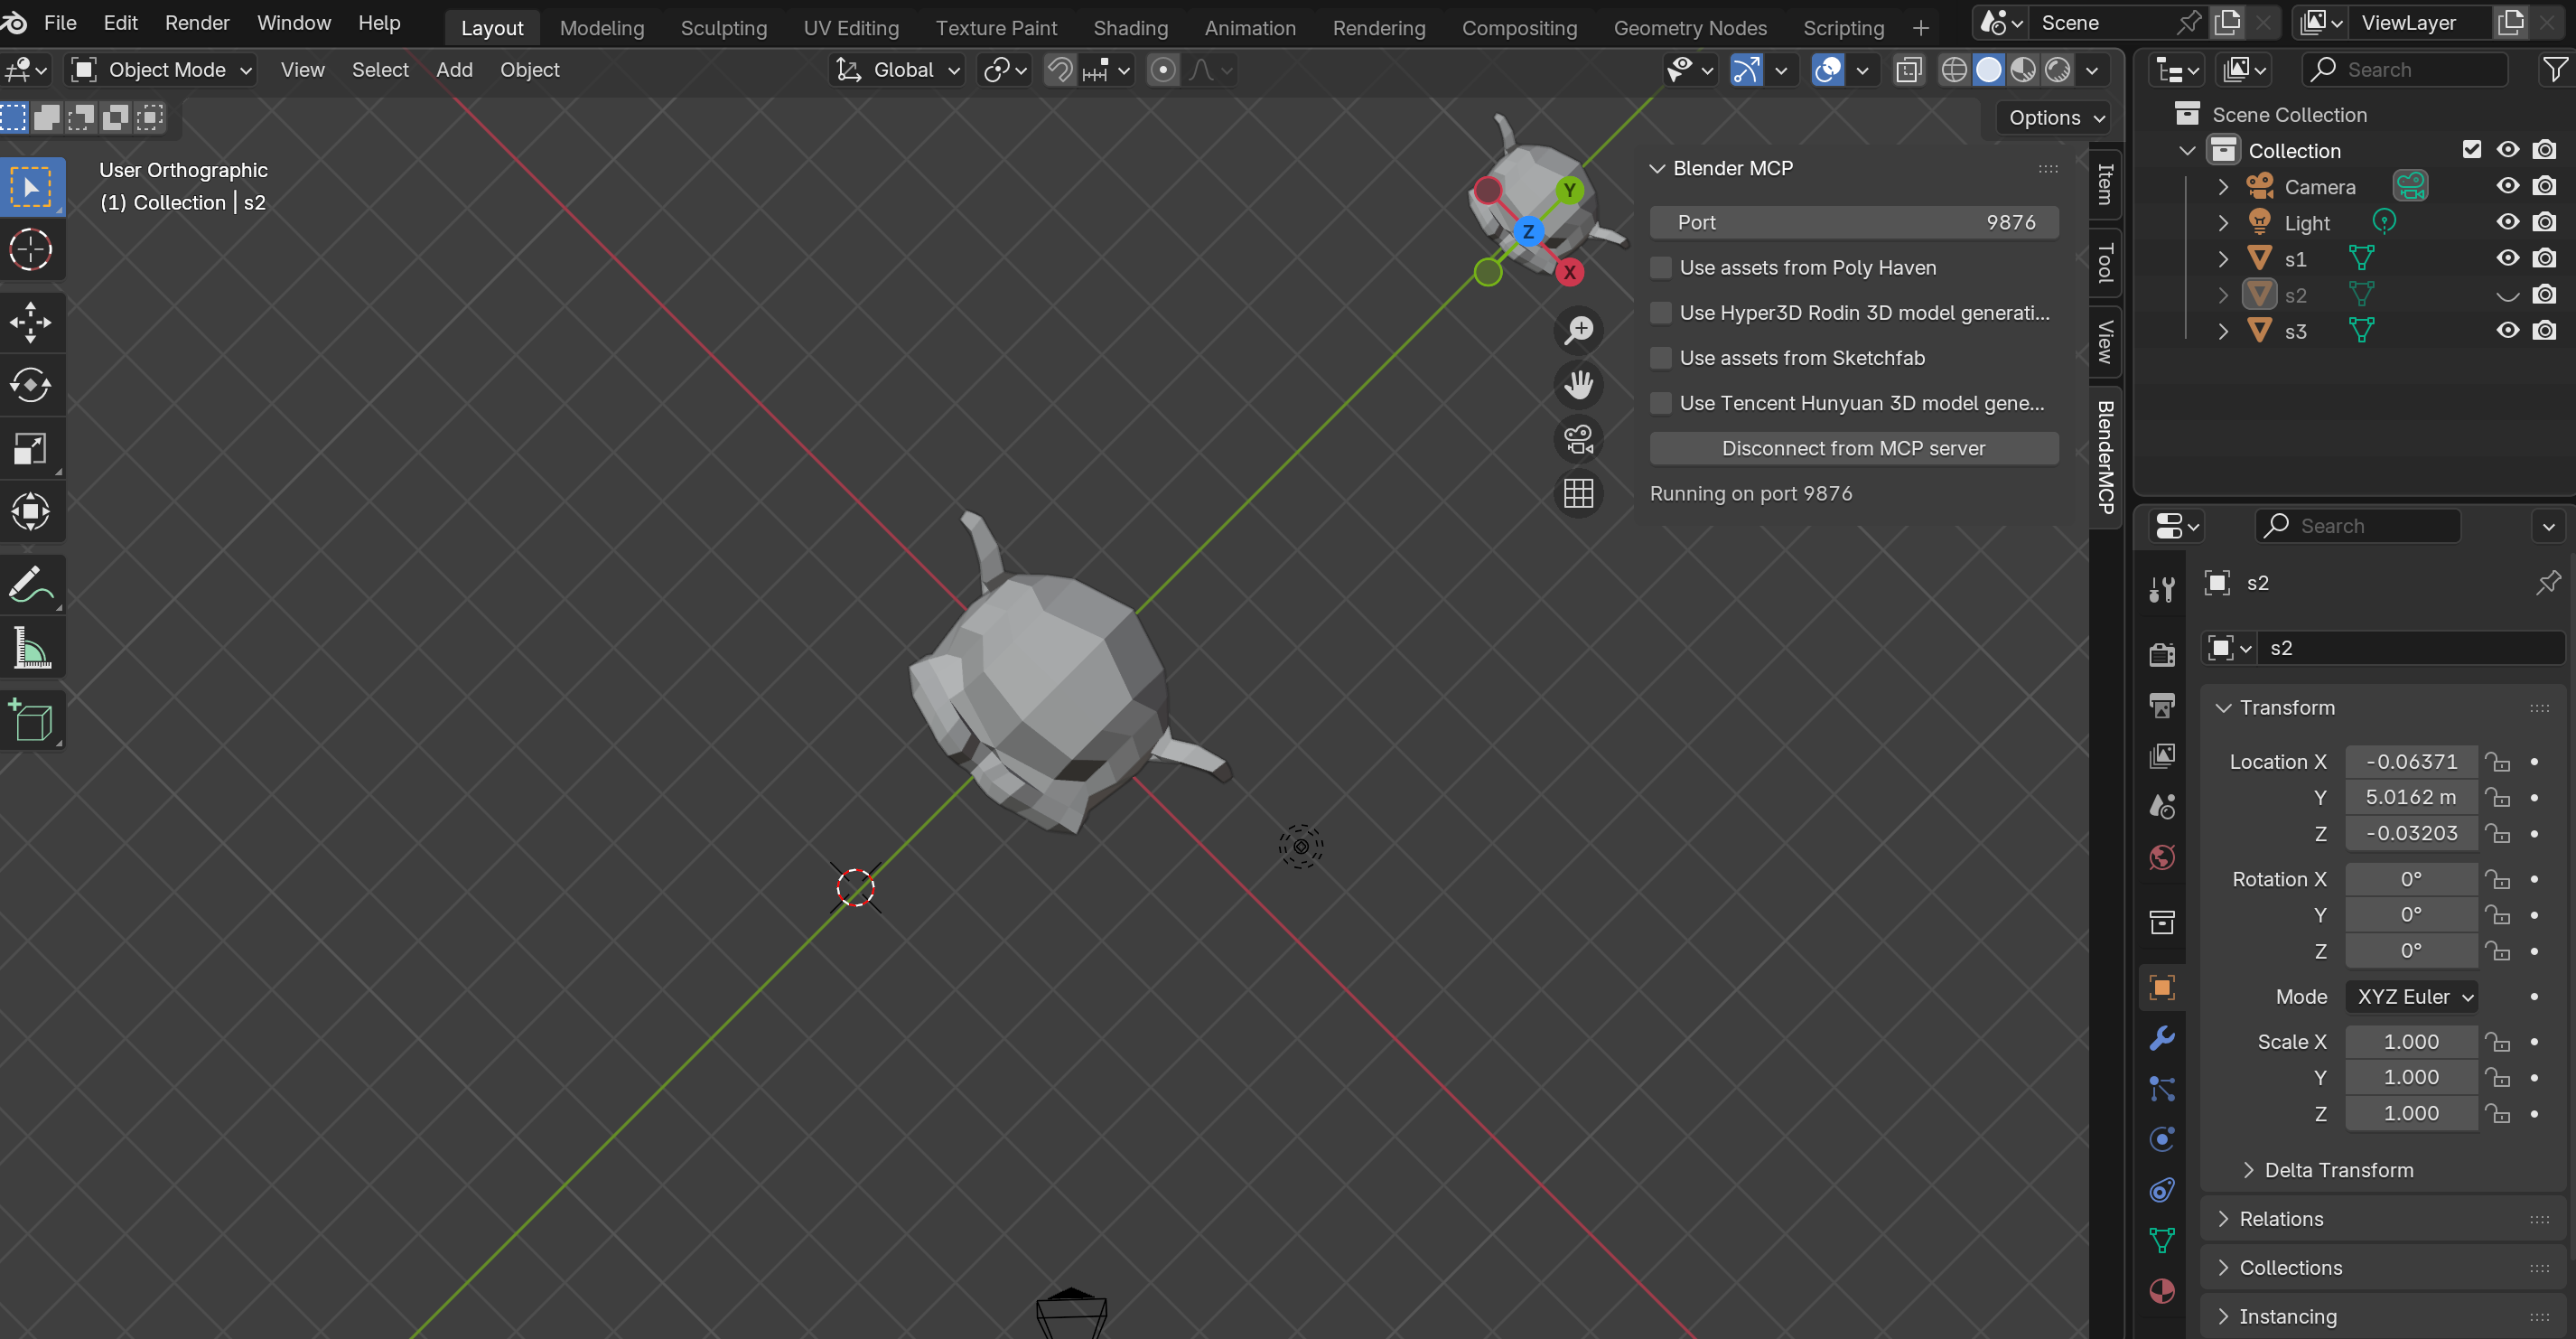
"Move the 3D cursor to the front of s1"
Now create an object at the cursor position:
"Create a cylinder at the cursor position"
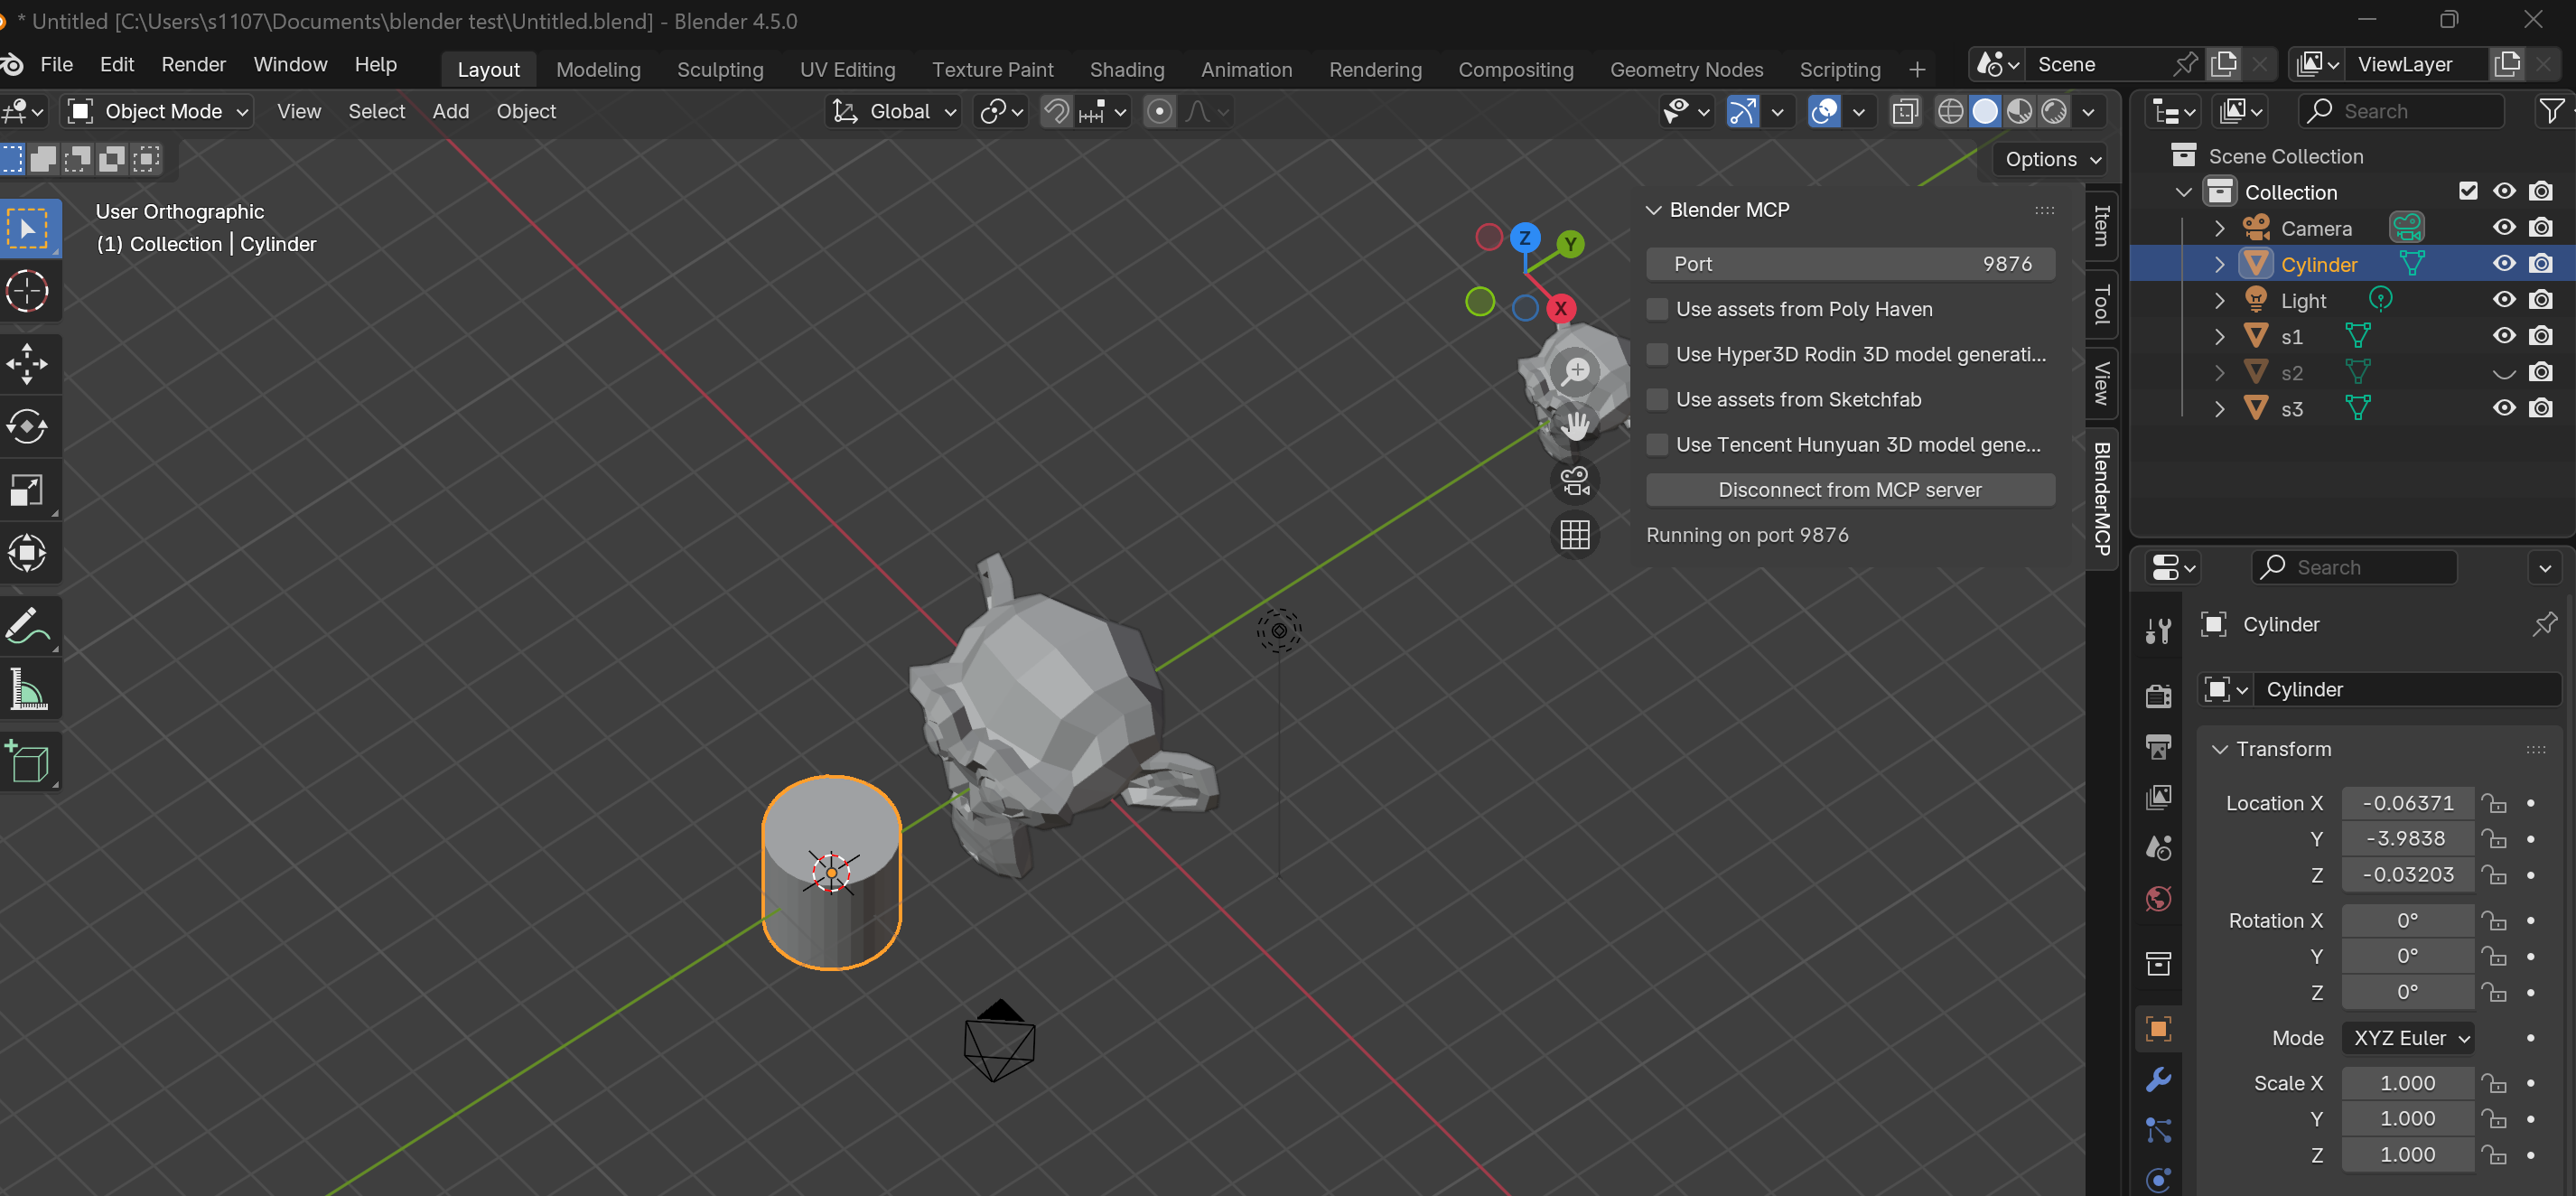
Important Note
If your command doesn't specify "at cursor position," Blender MCP will default to spawning at the world origin (0, 0, 0).
2. Cursor as Pivot Point
Let's rotate objects around the cursor instead of their origins:
"Set the 3D cursor as the pivot point""Rotate all objects 90 degrees around the pivot point"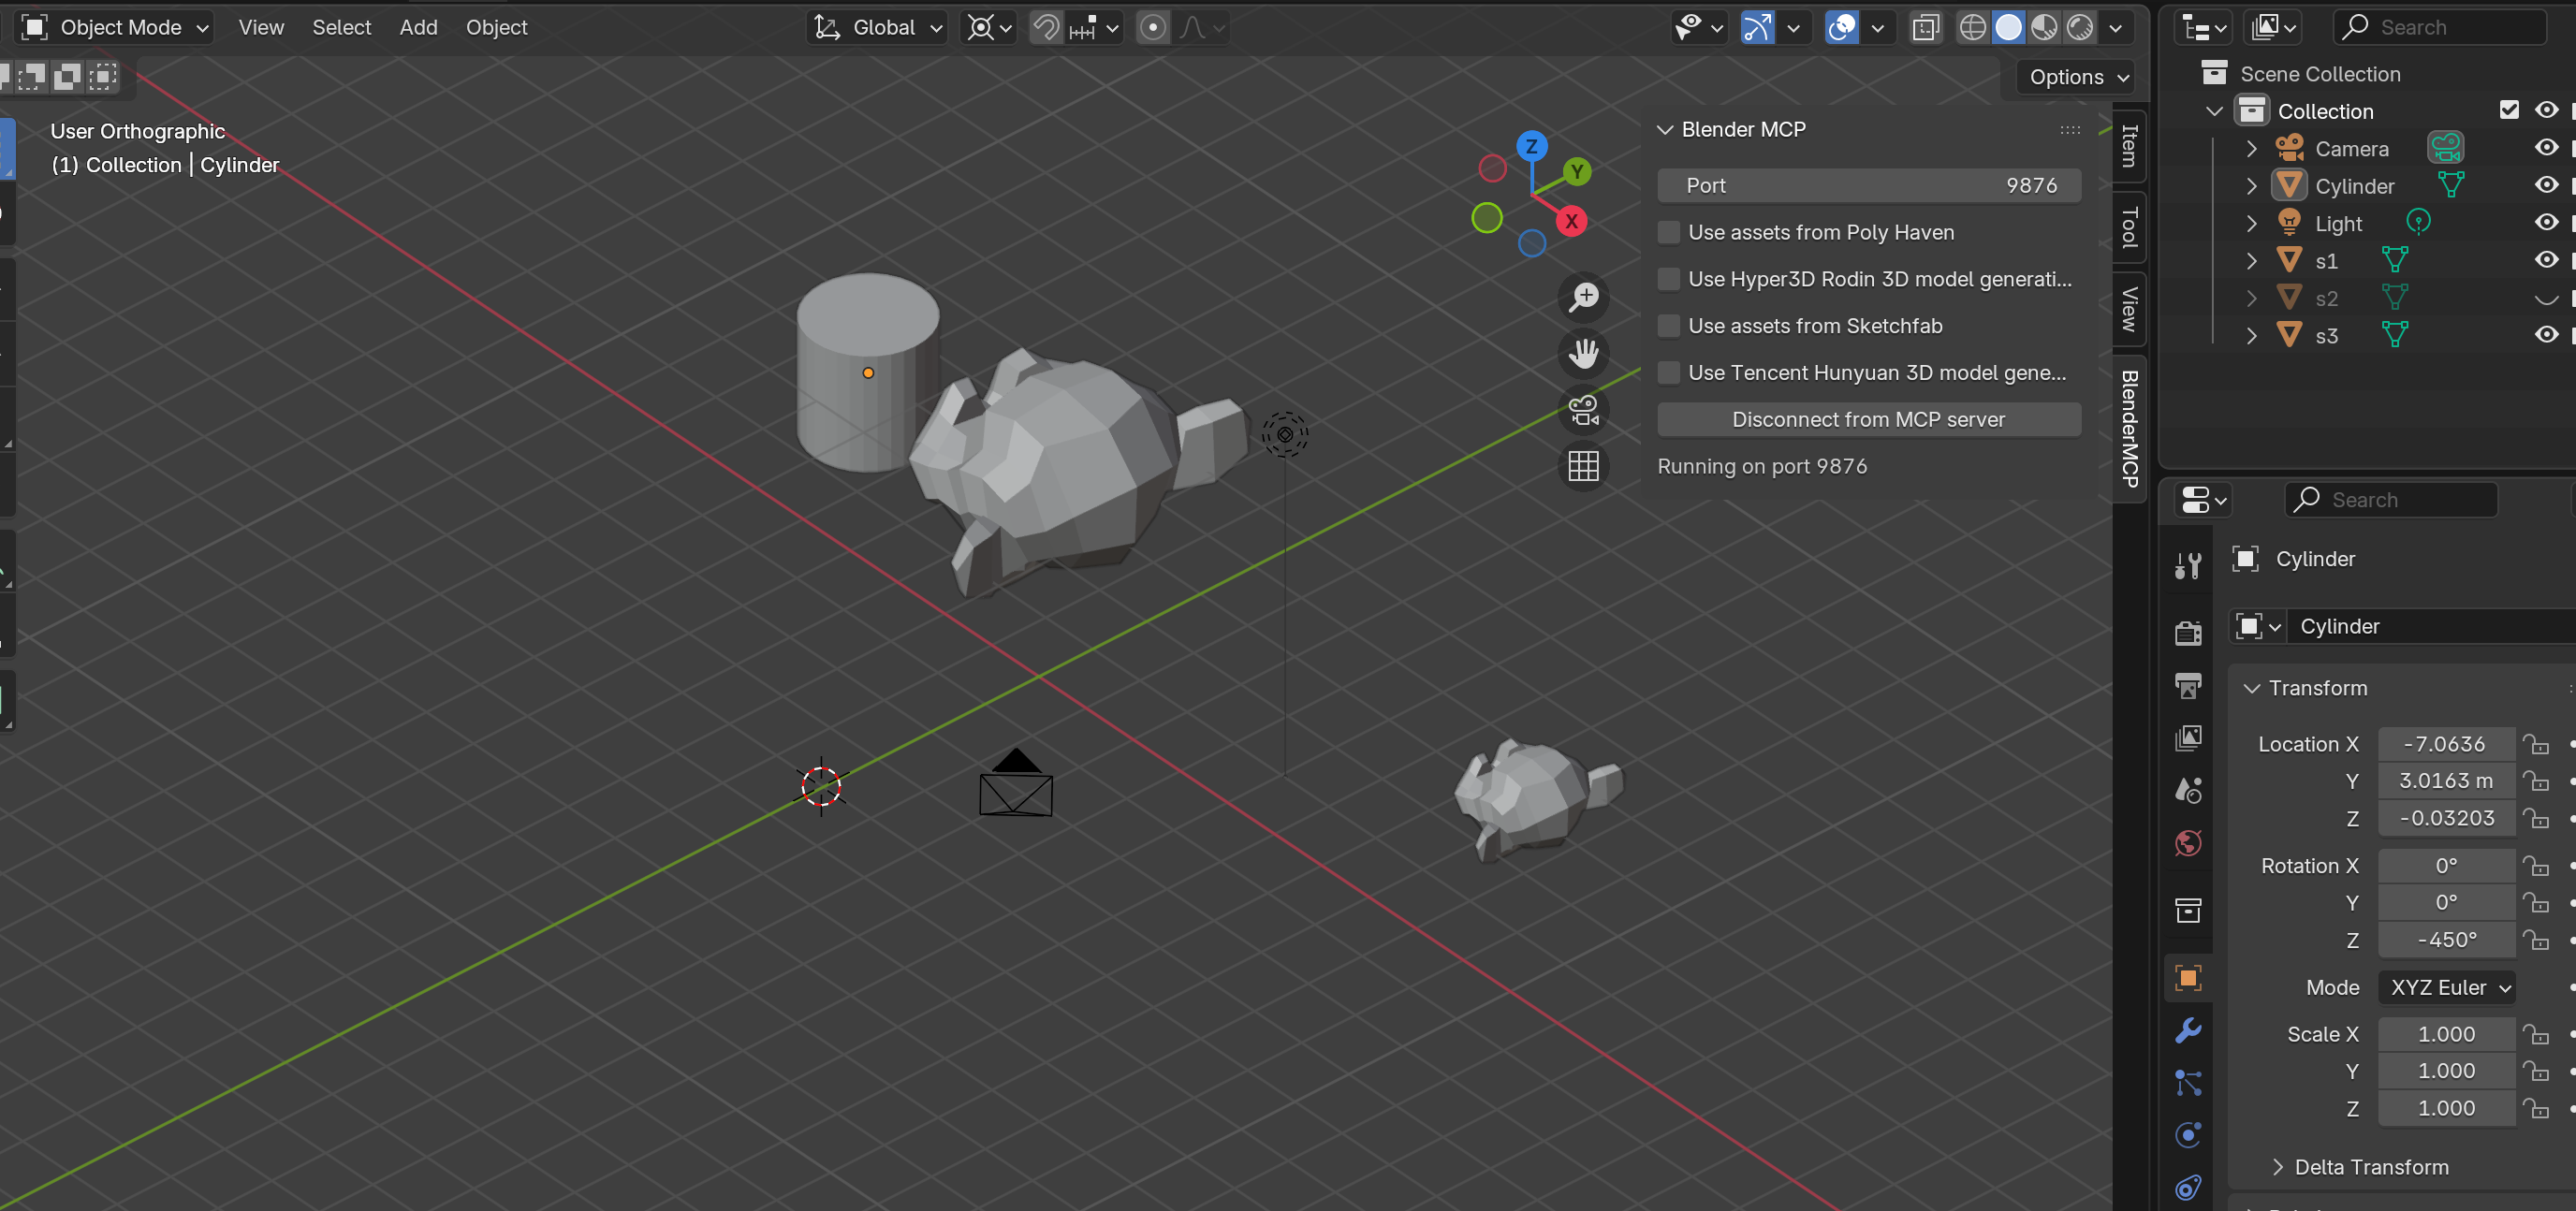
3. Snapping: Cursor to Object, Object to Cursor
"Snap the 3D cursor to the cylinder""Snap s3 to the 3D cursor"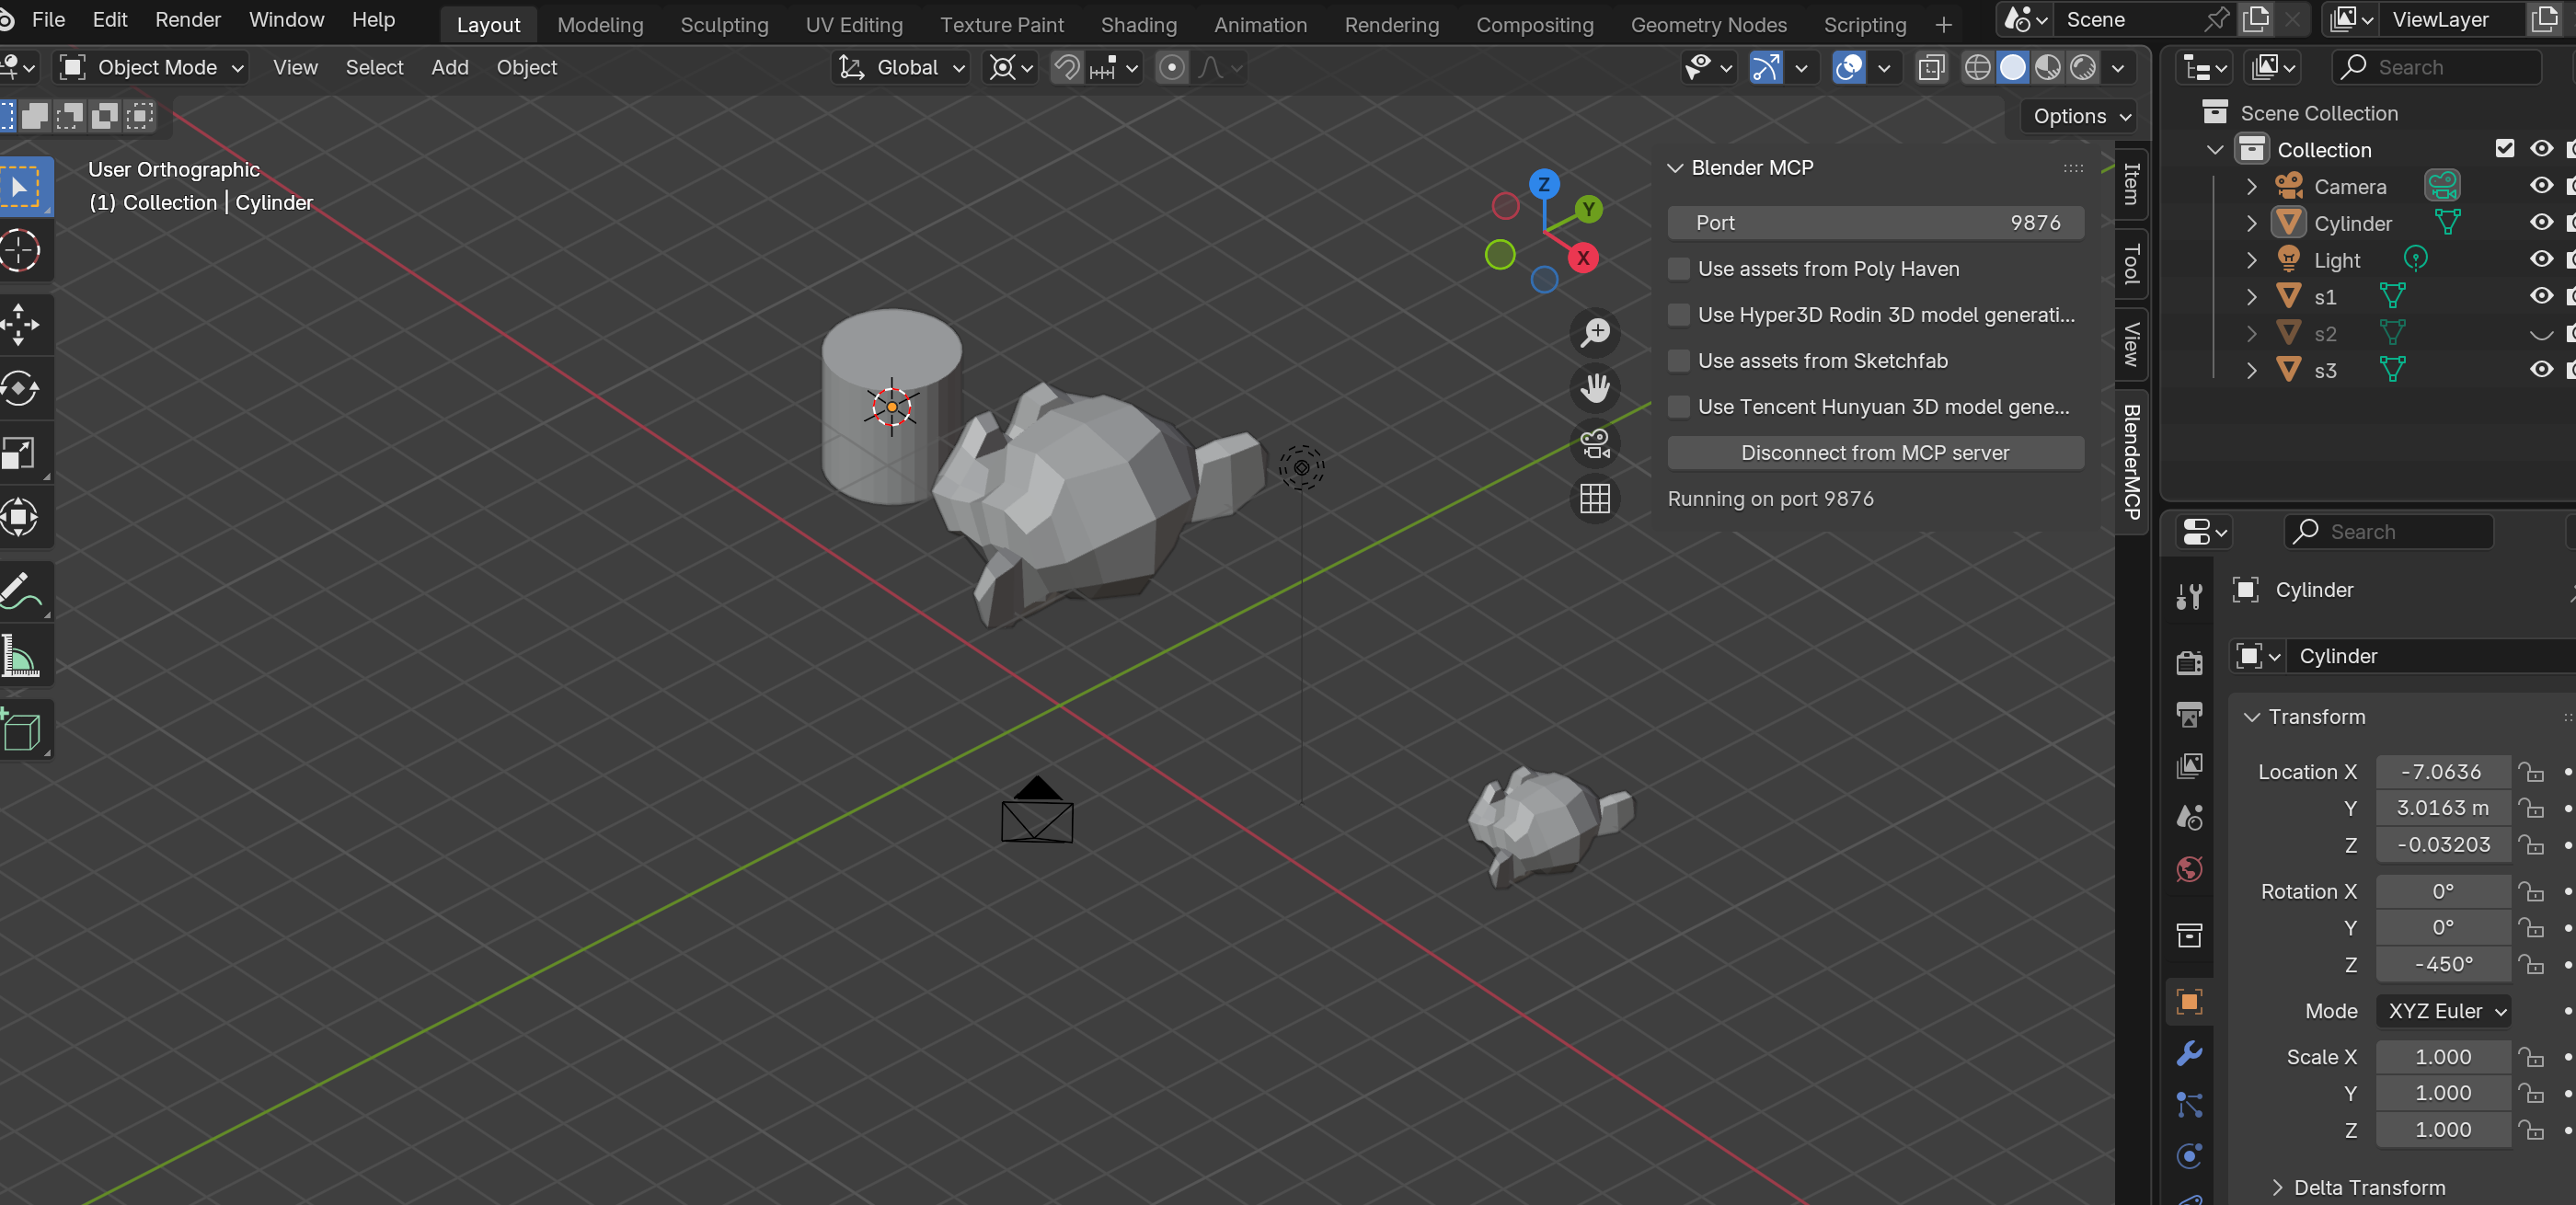
4. Resetting the Cursor
"Set the 3D cursor back to the world origin"

5. Origin Point Management with MCP
MCP Limitation: Affect Only Origins
Through testing, Blender MCP cannot independently move origin points. The command to move only the origin fails — it always moves the entire object.
Workaround: For now, this is a manual operation. Use the Options → "Affect Only: Origins" checkbox workflow.
However, you can achieve similar results by transforming the object appropriately:
"Create a plane and scale it 3x""Create a cube on the plane""Stretch the cube 3x along the Z-axis""Place the cube on the plane"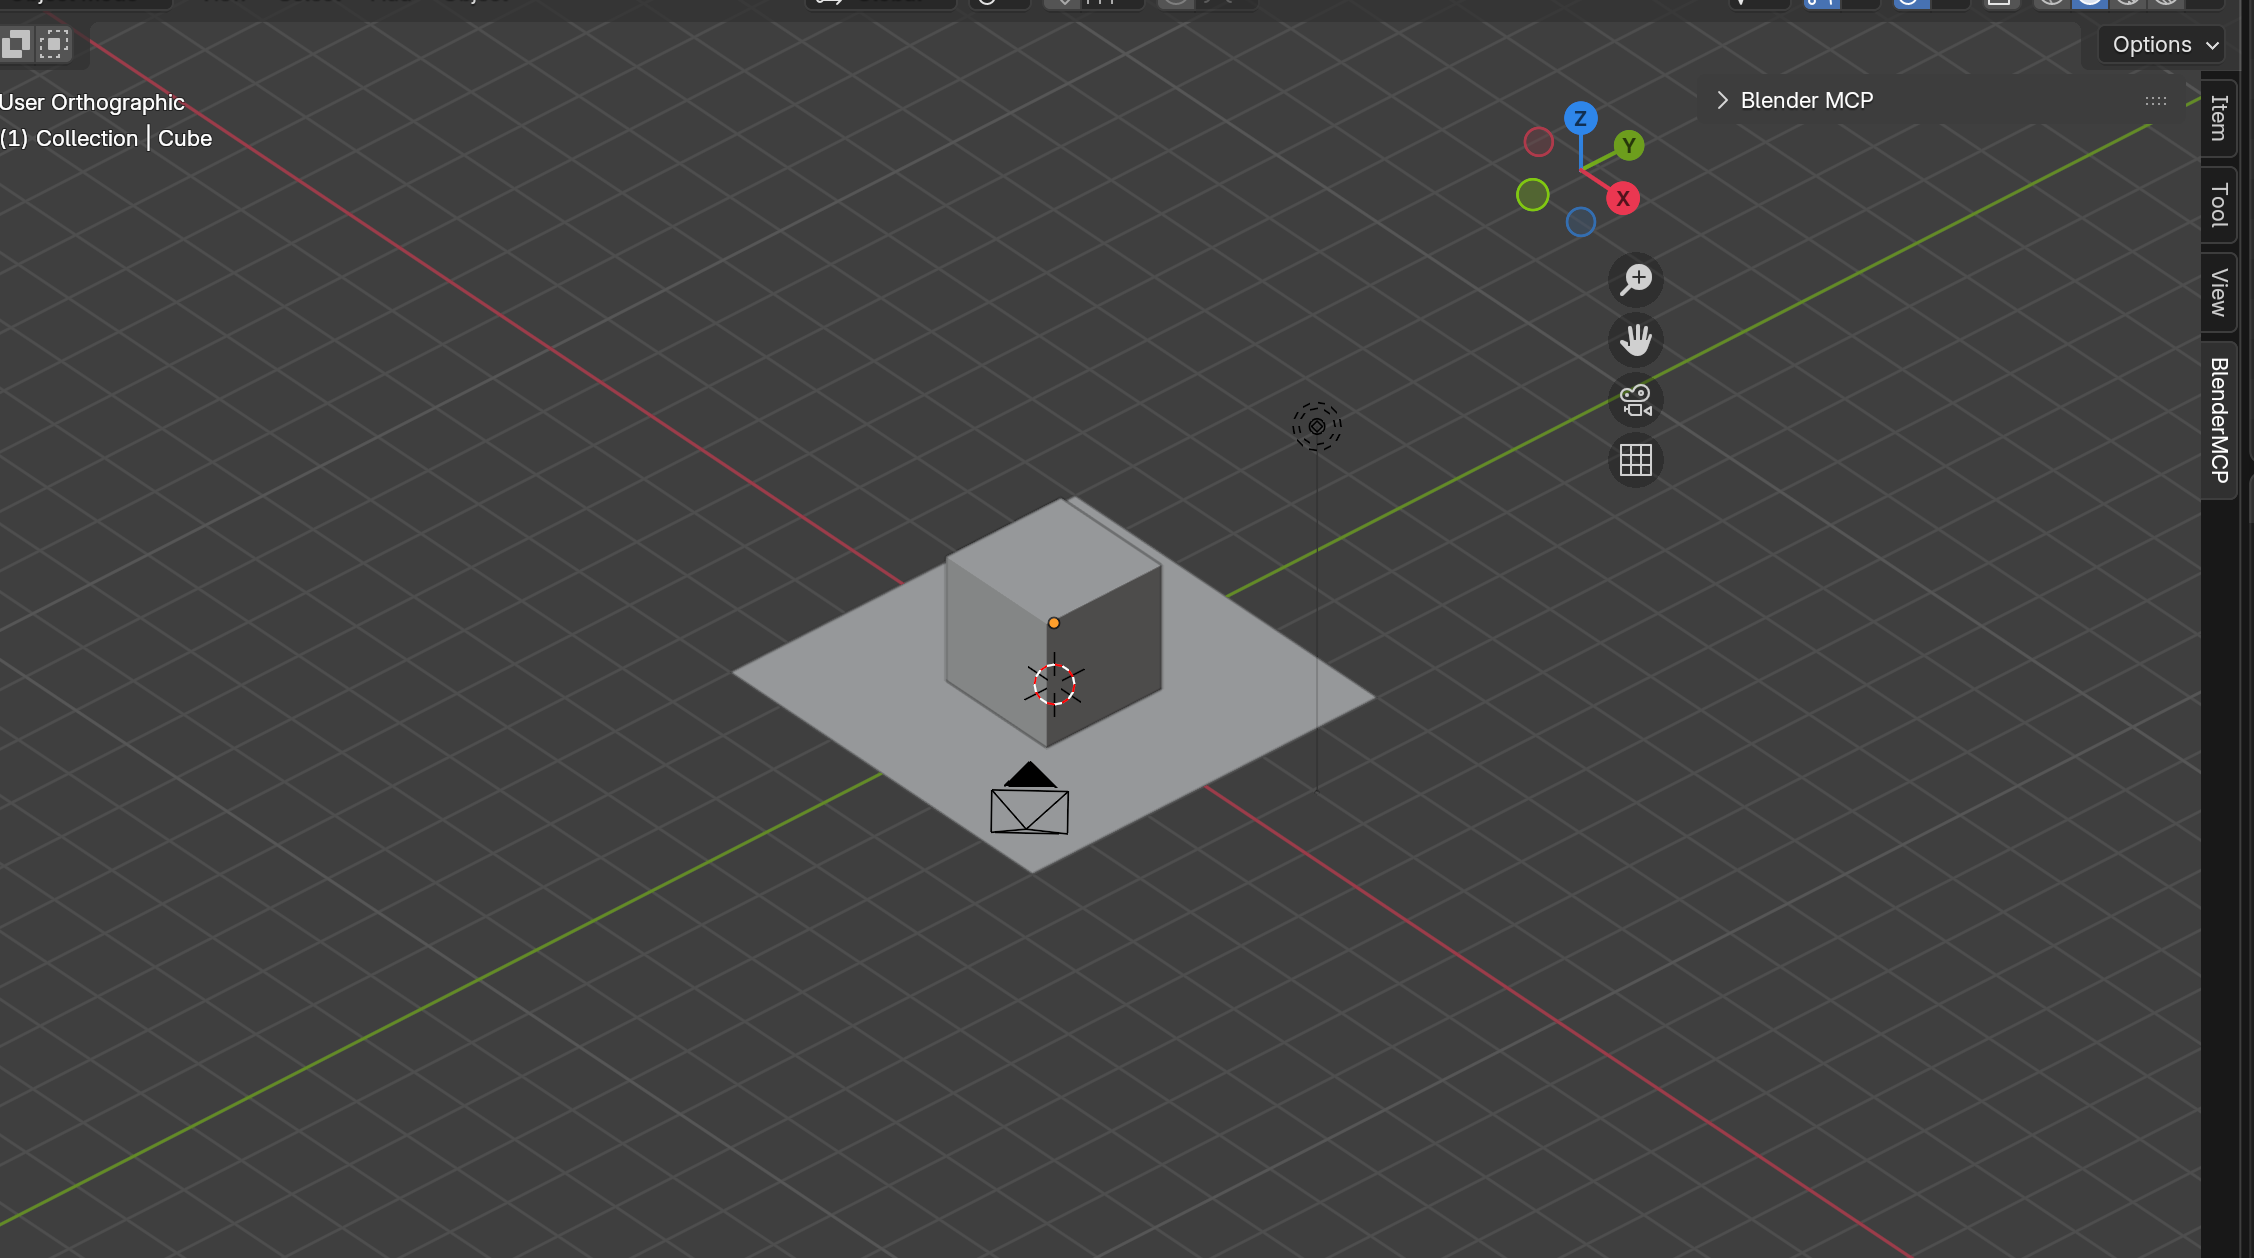
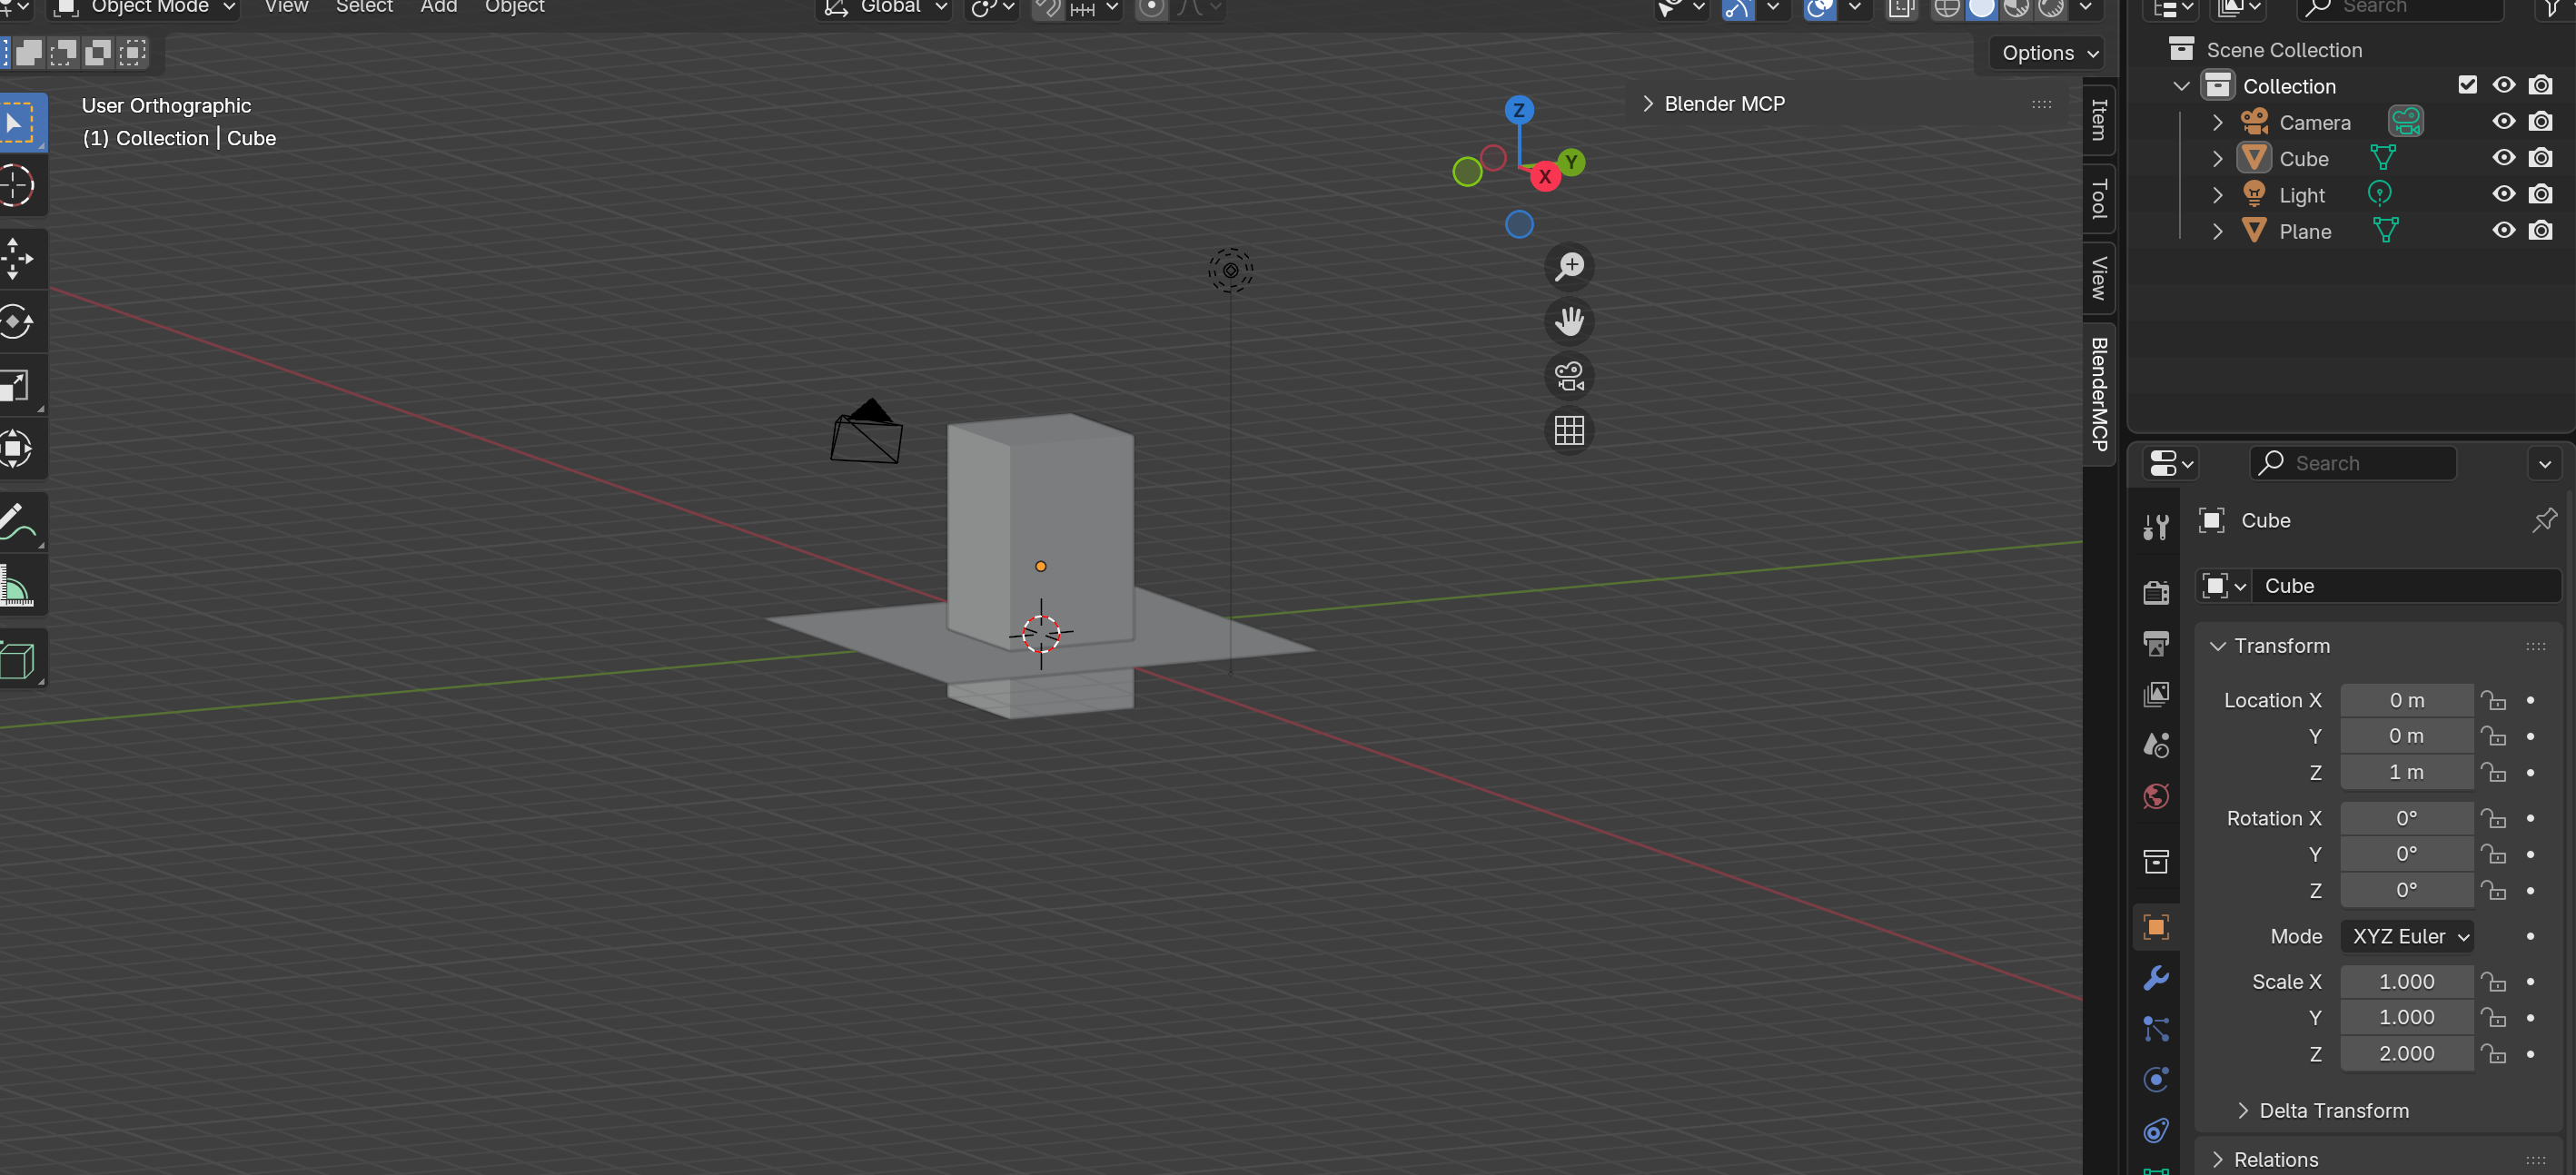
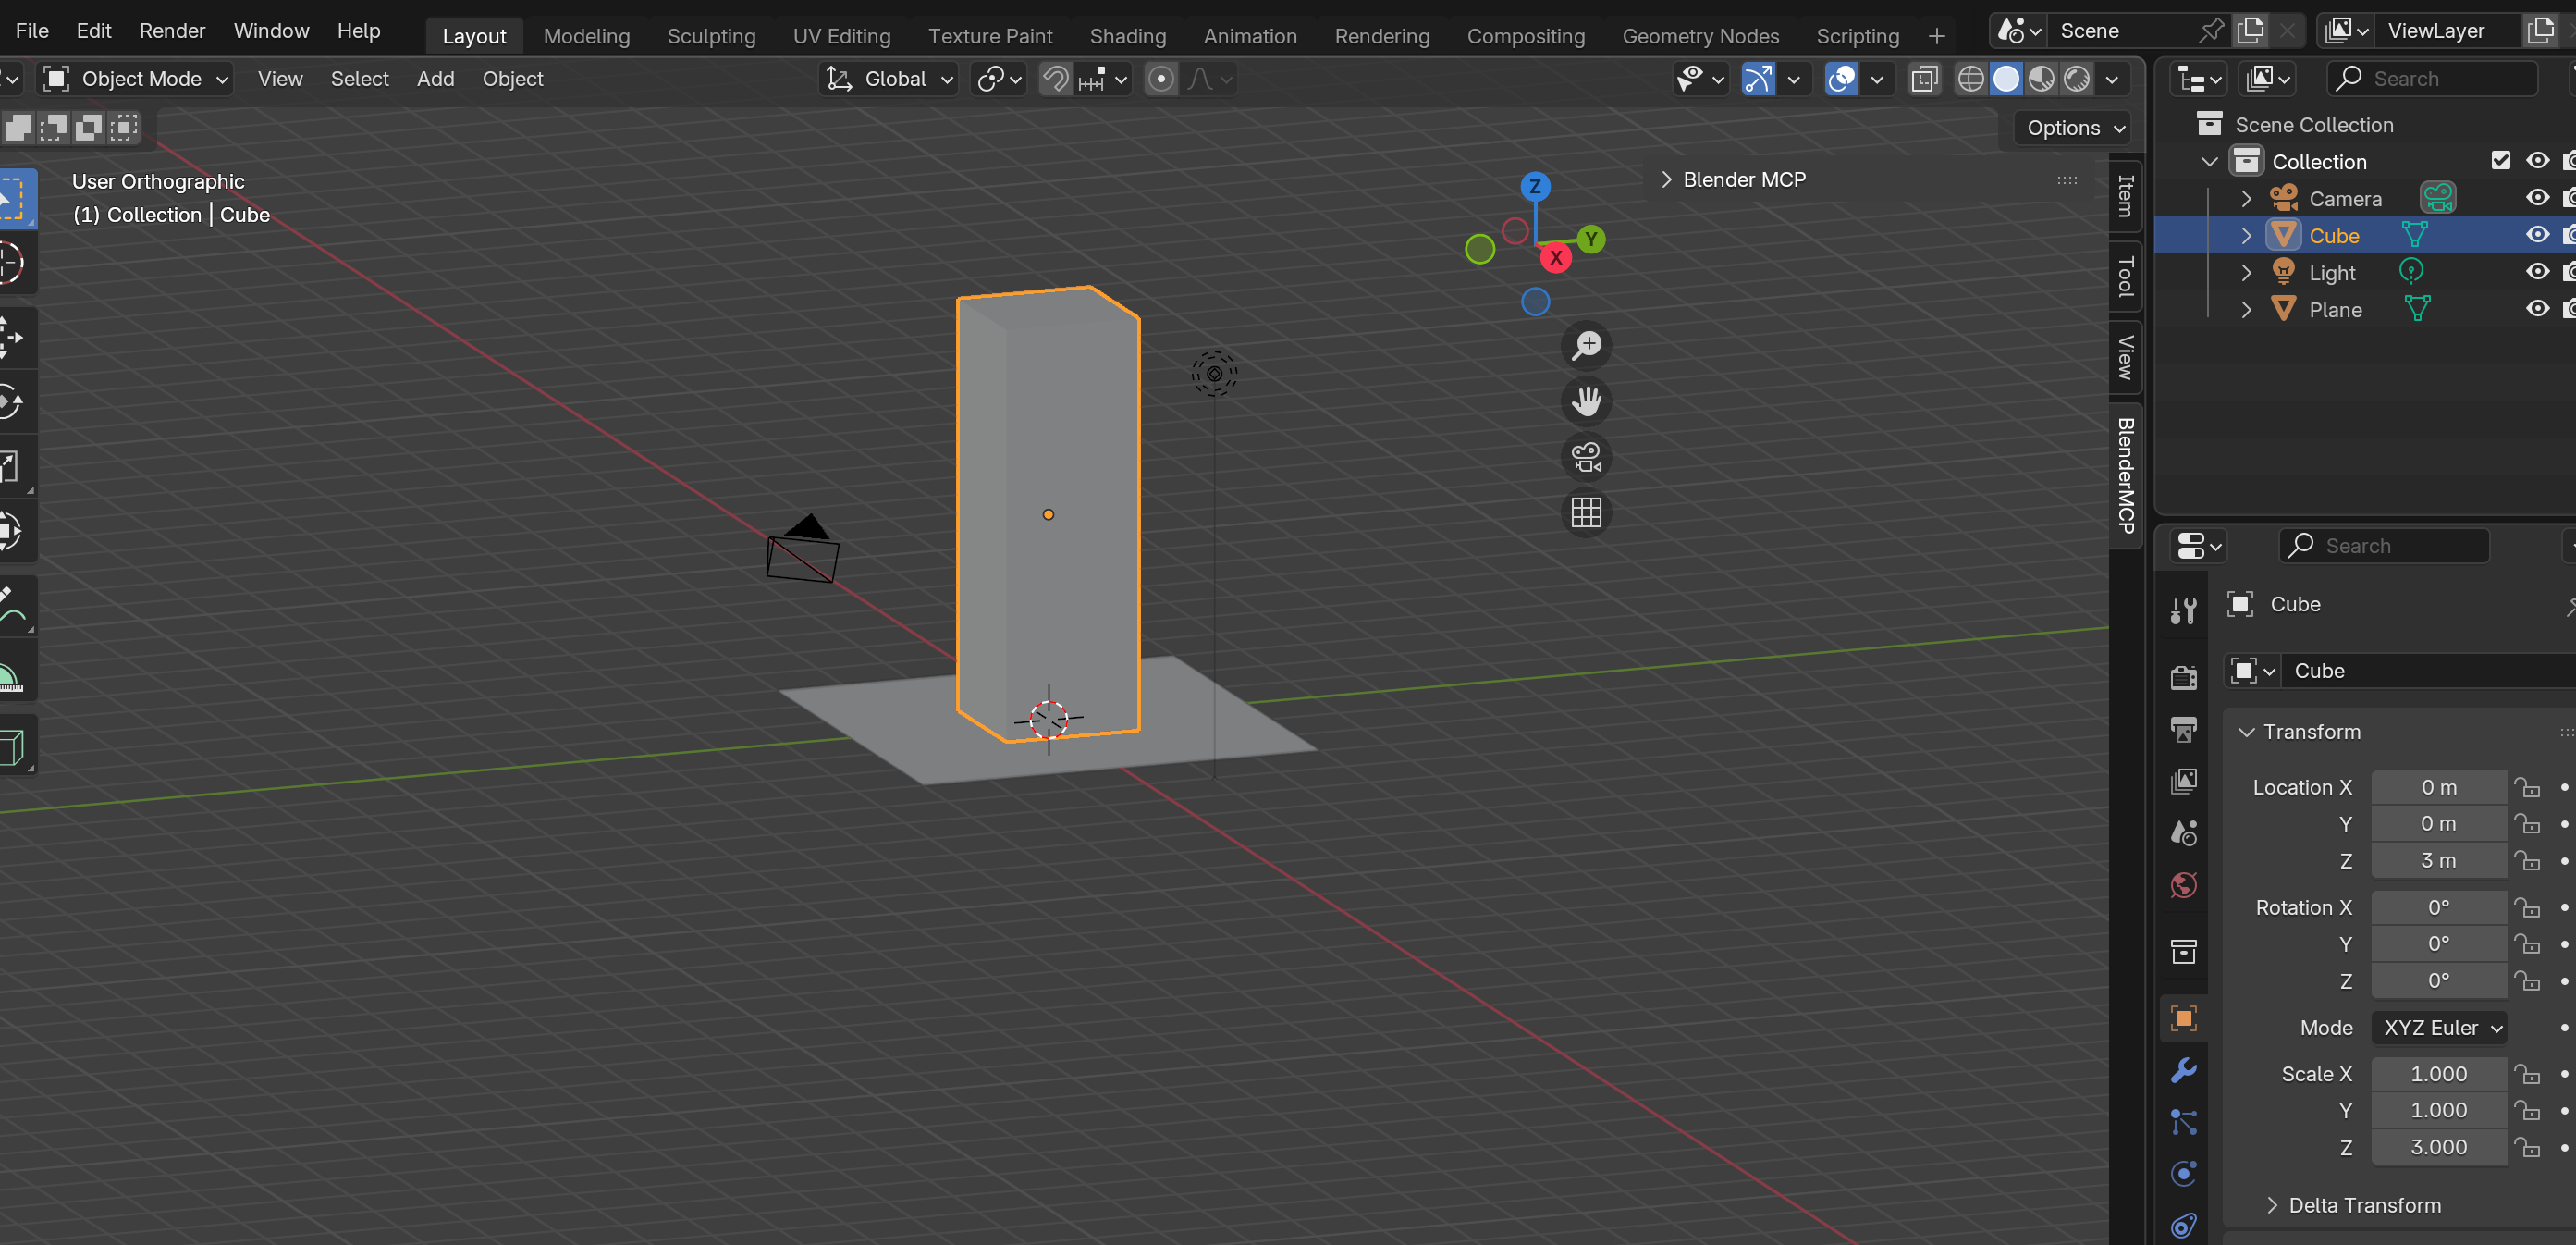
By stretching first, then repositioning, you get the same visual result as moving the origin — the cube now extends from the plane surface rather than from its center.
Professional Terminology Reference
| Term | Definition | Why It Matters |
|---|---|---|
| Object Mode | Default mode for whole-object transforms | Where you position, rotate, and scale complete objects |
| Edit Mode | Mode for modifying vertices, edges, faces | Where you sculpt the actual geometry |
| 3D Cursor | Red-and-white targeting ring | Determines where new objects spawn |
| Origin | Orange dot on each object | The point Blender uses for transforms |
| Pivot Point | Center of rotation/scaling | Can be cursor, median, individual origins, etc. |
| Global Coordinates | World-space directions | Never change — X is always left/right |
| Local Coordinates | Object-space directions | Rotate with the object |
| Active Element | Last-selected object (bright yellow) | Serves as reference for certain operations |
What's Next
You've now mastered Blender's invisible logic systems. You understand why objects spawn where they do, how to control rotation and scaling centers, and the critical difference between Global and Local coordinates.
But knowledge without practice is just potential. In the next tutorial, we'll put all of this to work with a complete modeling project.
Next up: Part 3: Case Practice — Girl with a Pearl Earring
We'll model Vermeer's famous painting from scratch, applying everything we've learned — cursor placement, origin management, coordinate systems, and MCP commands — to create a complete 3D scene.